At the moment, I’m lucky enough to have a Nutanix block at home that I use for demos (it’s coming along to Switzerland with me tomorrow). It’s not the model with the highest specs, but it helps in giving customers a chance to actually see the kit, and give partners some hands-on time. In case you are wondering, I’m actually working with a NX-2400, or a 4-node NX-2000 cluster, hence 2400.
Thing is though, that it was running an older version of the Nutanix Operating System (NOS), which I upgraded to the latest version (NOS 3.1) without a hitch, and it was running ESXi 5.0. And to play with some of the latest features, I actually decided to upgrade to ESXi 5.1, and I figured I might as well share how that worked out for me.
The steps are relatively simple, but I figured I’ll document them here anyway. One word of caution though:
- This was done with the latest info from the Nutanix knowledge base. Be sure to check if there are updated instructions available prior to upgrading your own block.
So, step one is to actually get the installation media for ESXi 5.1. In case of the NX-3000, you can use the standard ESXi 5.1 image. For the NX-2000 systems, you need to use an image that is customized by Nutanix. Contact myself or your local systems engineer to get the download location.
Next, create a bootable USB stick using the image. Easiest way I found is to actually format the stick with FAT32 as the filesystem. I recommend using a Windows system, or a Windows VM, since no matter what I tried, I couldn’t get it to boot using a Mac. Once the drive is formatted, I used UNetbootin:

Click on “Disc Image” and select the ISO file. Make sure “USB Drive” is selected, and point it to the correct drive. Then click on “OK”, and watch it go to work. If it gives you a message stating that menu.c32 is already present, click on the “Yes” button.
We’ll also need to edit the NFS heartbeat timeout settings. To do that, log on to vCenter, select the node and go to “Software” -> “Advanced settings”. There go to the NFS entries, and modify the “NFS.HeartbeatTimeout” setting to 30 seconds. Do that for each host.
Next, we need to make sure the multiextent module is loaded. Add the following lines to /etc/rc.local.d/local.sh on each host (if not already there):
#added to support multiextent

localcli system module load -m multiextent

#end of adding
Then restart the host.
Once you are done, it is time to start the upgrade. Go in to the BIOS (using the Delete key) on the node you want to upgrade, and change the boot order so that you actually start off of your USB stick. Once you save the config and restart, you will be given a menu where you select the second option:

After that you should be able to see the trusted ESXi boot sequence:

At the installation screen, just hit the “Enter” key to continue with the installation. Read the license agreement, and continue with F11. Next, you are asked where the installation should reside. Normally you should see the Intel SSD already have a VMFS partition, indicated by the small asterisk in front of the disk. Select that disk and press “Enter” to continue:

Next, a prompt should show up asking if you want to upgrade. Select that option, and press “enter” once more:

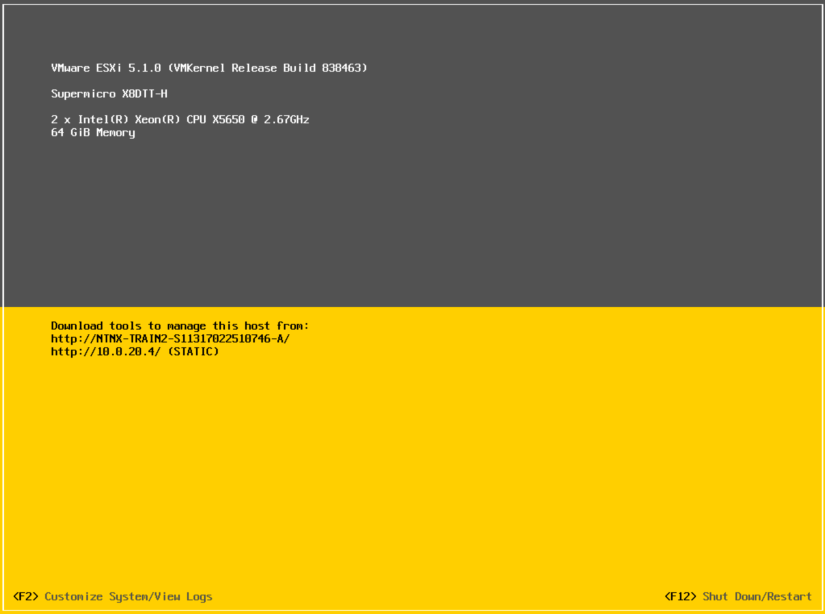
The final step is to confirm your upgrade by pressing the “F11” key. Once the upgrade is done, remove the USB thumb drive, and reboot the server by again hitting the “Enter” key. Let the node reboot, change the boot order to the original sequence, and, tadaaaaaa:

Now, obviously this would be easier using the vSphere Update Manager, but this was the solution I used, since I only installed the vCenter virtual appliance. Not pretty but it works.
One key thing left to do, is to re-register the controller VMs on your ESXi host. You can do this via the vSphere client going directly to the ESXi host. Just right-click the VM and select “remove from inventory”. Then browse the datastore, go to the folder saying “ServiceVM-1.24_Ubuntu” and add the VM to the inventory using the VMX file. You can now start your VM after you confirmed that you moved it. 🙂
The other alternative to re-register your VM using vim-cmd via an SSH session on to your ESXi host. Just check which VMs you have running:
vim-cmd vmsvc/getallvms
Vmid Name File Guest OS Version Annotation
190 NTNX-TRAIN2-S11317022510746-A-CVM--2- [NTNX-local-ds-S11317022510746-A] ServiceVM/ServiceVM.vmx ubuntu64Guest vmx-07Remember the VMID and de-register the VM:
vim-cmd vmsvc/unregister [vmid of controller VM]Now simply re-register the VM:
vim-cmd solo/register [/full/file/path/to/the/controller_vm_name.vmx]You might want to rename the controller VM once you have registered it.
Should you have any issues starting the VM, make sure that there is no line saying:
sched.mem.prealloc = "TRUE"in the .vmx file of you VM. If this line is present, remove it, and re-register your VM.
