Nutanix has released a product called “Karbon” which according to the website allows you to:
Get a production-ready Kubernetes Cluster up and running in 20 minutes.
Now, I’ll leave it up to the marketing people to verify if it takes 20 minutes or not. But once you have your cluster up and running, our developers assumed that anyone connecting to the Karbon cluster will use a Linux based operating system.
Since that isn’t the case for everyone, and I like to try other things, I wanted to see if I can connect to the Karbon cluster using Microsoft Windows as the operating system. This works fine, but there will be a couple of things you need to do.
First, log on to your Karbon cluster, select the cluster that you want to connect to, and from the “actions” menu at the top select the “SSH Access option”, which will give you a dialog window with a download link:
Download the file in a location of your choice. Next, open the file, but open it in an editor that is capable of properly handling files created on Linux. This is important since there is a difference in the way a press of the “Enter” key is written in text files between the operating systems.
Once the file is opened, you will see two larger blocks of information. One part can be found in the “private_key” part of the file, and one in the “user_cert” part of the file. First off, select all of the lines after:
private_key='
So essentially you are copying everything from (and including):
-----BEGIN RSA PRIVATE KEY-----
down to (and including):
-----BEGIN RSA PRIVATE KEY-----
But make sure you do not include the single quote at the start and the end. Take this and save it as a new file, for example called “karbon-user”
Then, do the same thing for everything following:
user_cert='
And copy everything starting with “ssh-rsa-cert-v01” down to the last character of that long string, but do not include the final single quote. Save that as a file for example called “karbon-user-cert.pub”
Next up, start PowerShell on your Windows system as an administrator and start the ssh-agent service:
Start-Service ssh-agent
And if you want to have it start automatically:
Set-Service ssh-agent -StartupType Automatic
Then add your users private key file that you save before:
ssh-add C:\Users\Bas\Downloads\karbon-user
Obviously replace the path above to the location on your system 😉
Next, the only thing you have to do is ssh into the IP address of your Karbon VM while passing the public key we also saved before:
Again, replace the path to the file, and replace the IP to your VMs IP. But once that is going, you can connect to your Karbon VMs and work with them without having to set up a Linux system. 🙂
In the process of setting up our new environment for SAP HANA validation work, I spent some time in the data center setting up our environment, and I ran into some caveats which I figured I would share.
To set the stage, I am working with a Lenovo HX Nutanix cluster. The cluster consists of two HX-7820 appliances with 4x Intel 8180M CPU’s, 3TB RAM, NVMe, SSD and among other things two Mellanox CX-4 dual port NICs. The other two appliances are two HX-7821 with pretty much the same configuration except these systems have 6TB of RAM. The idea is to give this cluster as much performance as we can and to do that we decided to switch on Remote Direct Memory Access, also called RDMA in short.
Now, switching on RDMA isn’t that hard. Nutanix has added support for RDMA with AOS version 5.5, and according to our “one-click” mantra, it is as simple as going into our Prism web interface, clicking the gear symbol, going to “Network Configuration” and from the “Internal Interface” tab enable RDMA and put in the info about the subnet and VLAN you want to use as well as the priority number. On the switch side, you don’t need anything extremely complicated. On our Mellanox switch we did the following (note that you’d normally need to disable flow control on each port, but this is the default on Mellanox switches):
interface vlan 4000
dcb priority-flow-control enable force
dcb priority-flow-control priority 3 enable
interface ethernet 1/29/1 dcb priority-flow-control mode on force
interface ethernet 1/29/2 dcb priority-flow-control mode on force
interface ethernet 1/29/3 dcb priority-flow-control mode on force
interface ethernet 1/29/4 dcb priority-flow-control mode on force
With all of that in place, you would normally expect to see a small progress bar and that is it. RDMA set up and working.
Except that it wasn’t quite as easy in our scenario…
You see, one of the current caveats is that when you image a Nutanix host with AHV, we pass through the entire PCI device, in this case the NIC, to the controller VM (cVM). The benefit is that the cVM now has exclusive access to the PCI device. The issue that arises is that we currently do not forward a single port, which isn’t ideal in the case of a NIC that has multiple ports. Add on top of that the fact that we don’t give you the choice which port to use for RDMA, and the situation becomes slightly muddied.
So, first off. We essentially do nothing more than see if we have an RDMA capable NIC, and we pass through the first one that find during the imaging process. In a normal situation, this will always the RDMA capable NIC on the PCI-slot with the lowest slot number. It will also normally be the first NIC port that we find. Meaning that if you have for example a non-RDMA capable Intel NIC in PCI slot 4, and two dual port RDMA capable cards in slot 5 and 6, your designated RDMA interface is going to be the first port on the interface in slot 5.
Since you might want to see what MAC-address is being used, you can check from the cVM by running the ifconfig command against the rdma0 interface. Note that this interface by default will exist, but isn’t online, so it will not show up if you just run an ifconfig command without parameters:
To double check if you have the correct interface connected to your switch ports my tip would be to access the lights out management interface (IMM / ILO/ iDRAC, IPMI, etc.) and check your PCI devices from there. Usually these will tell you the MAC of the interface for the various PCI devices. Make sure you double check if you are connected to the right physical NIC and switch port.
The next topic that might come up is the fact that we will automatically disable c-states on the AHV host in the process of enabling RDMA. This is all done in the background, and again normally will be done automatically. In our case, since we added a couple of new nodes to the cluster, the BIOS settings were not the same across the cluster. The result of that was that on the AHV hosts, the HX-7820 nodes had the following file available that contained a value of “1”:
Due to the BIOS settings that were different on the NX-7821 hosts that we added, this file and the cpuidle (sub-)directories didn’t exist on the host. While the RDMA script tried to disable c-states 3 and 4 on the hosts, this was only successful on two out of the four nodes in the cluster. Upon comparing the BIOS settings we noticed some deviations in available settings due to differences in versions, and differences in some of the settings as they were delivered to us (MWAIT for example). After modifying the settings to match the other systems, the directories were now available and we could apply the c-states to all systems.
While we obviously have some work to do to add some more resiliency and flexibility to the way we enable RDMA, and it doesn’t hurt to have an operational procedure to ensure settings are the same on all systems before going online with them, I just want to emphasize one thing:
One click on the Nutanix platform works beautifully when all systems are the same.
There are however quite a couple of caveats that come into play when you work with a heterogeneous environment/setup:
Double check your settings at the BIOS level. Make them uniform as much as you can, but be aware of the fact that sometimes certain settings or options might not even be available or configurable anymore.
Plan your physical layout. Try not to mix a different number of adapters per host.
Create a physical design that can assist the people cabling with what to plug where to ensure consistency.
You can’t always avoid making changes to a production system, but if at all possible, have a similar smaller cluster for the purpose of quality assurance.
If you are working in a setup with a variety of systems things will hopefully work as designed but might not. Log tickets where possible, and provide info that goes a bit further than “it doesn’t work”. 😉
Oh, and one more thing. Plan extra time. The “quick” change of cables and enabling of RDMA ended up in spending 4 hours in the data center working through all of this. And that is with myself being pretty familiar with all of this. If you are new to this, again if at all possible, take your time to work through this, versus doing this on the fly and running into issues when you are supposed to be going live. 🙂
To say my last blog post is “a while ago” would a grave understatement. Unfortunately, I’ve mainly been busy with something that was entirely new for Nutanix, and with the amount of work involved and the sensitive nature of what I was working on, there was relatively little room left to blog. Especially since I usually ended up blogging about stuff, I stumbled upon while doing my job or researching.
This all started with me changing from my presales focussed role to our internal “Solutions & Performance Engineering” team, which focusses on the business-critical applications running on the Nutanix platform. In essence, those applications that are the lifeblood of a company. Applications which, if they are unavailable, will cost the company significant amounts of money.
One of those applications is SAP, or more specifically the SAP HANA in-memory database. My colleagues (mainly Kasim Hansia, Rainer Wacker and Alexander Thoma) had already been doing a great job, and all of the SAP applications were certified to run on the Nutanix platform in November 2016. The big question was always “When can we run SAP HANA on Nutanix?”.
Working on the answer to this question is what I’ve been busy with the last year or so. While I won’t bother you with the specific details on the business side of things, I do want to take a bit of time to show what it’s like to go through the process of validating a new application.
First off, the SAP HANA in-memory database is an application that scales to levels that many people won’t ever see in action. You can run HANA in two ways. You either scale up the resources of a single server, for example running with up to 20TB of memory, or you can scale out by adding multiple servers and distributing the load across all servers.
Now, SAP has given the customer two options to select hardware to run SAP HANA. One is an “appliance model” where you choose a configuration as a whole, and everything will run in a pre-tested and validated fashion. You are ensured of a specific behavior of the whole system while running your application. The other option is something called “Tailored Data Center Integration” or TDI in short, where in essence you select your hardware from a hardware compatibility list and have the freedom to mix and match.
What we have done is work with SAP to introduce a new third category called “Hyperconverged Infrastructure” or HCI. The HCI category assumes that we are running SAP HANA in a virtualized fashion, and “collapse” several infrastructure components such as compute and storage to an integrated system.
The limitations on the maximum sizes for this category are smaller than for the other two categories, but the requirements that are in place for this certification do not offer much more leeway. For example, a storage test to ensure storage performance, where initially log overwrite operations needed to have latency <= 400 microseconds (this changed later on). Another example is a test suite of close to 700 tests that emulate real-world issues, and the performance delta is then compared to a bare-metal installation, with only a specific maximum performance delta between the two giving you a passing grade.
All this meant that I had my work cut out for me from the start. We started off working with a server model that wasn’t qualified before, before switching to the validation hardware, namely a Lenovo SR950. A big four-socket server with the fastest CPUs we could use, namely the Intel Xeon Platinum 8180M Processors, 3072 GB of RAM, 3.84TB SSDs and 1.6 TB NVMes.
Now, as much as Nutanix is a software company, we do strictly check that hardware meets specific prerequisites to ensure a smooth user experience and to make sure that certain performance metrics are a given. The issue is that all of the checks and functionality in place didn’t work for this new hardware. Simple things like making the status indicator LED for the NVMe light up, or mapping the physical drive locations back to the diagram view in Prism. It meant modifying Python files that handle how hardware is accessed, packaging everything back up into Python egg files, restarting services and then magically seeing drives that the system was able to access. Or passing through NICs so that we could test with “RDMA over Converged Ethernet” or RoCE, and changing BIOS settings to ensure maximum performance.
And while pushing the underlying hardware to its limits, it also meant we had to dive deep, and I mean very deep, into the software side of things. From things like experimenting with c-states on the CPU and NIC multiqueueing in the virtual machines, down to changing parameters in our product, ensuring that specific CPU features are passed through, the pinning of virtual CPUs to their physical location or making changes to how often a vmexit instruction is called.
I can’t go into all of the specific details since some of it is Nutanix’ intellectual property, but I’ll check what I can share in future posts, and if you have any specific questions, please ask them, and I’ll try to answer as best I can. What I can say is that we pushed the limits of our platform and quite a couple of the things we found are going to be implemented back into the product, and I expect a lot of those changes to show up in the release notes of an upcoming release.
Fact is, I learned a ton of new things, and this all culminated in our validation for pre-production use of SAP HANA on Nutanix AHV as announced in https://www.nutanix.com/2018/06/05/finally-can-talk-sap-hana-nutanix/, and we are working full steam ahead on the last steps to get production support. It was and continues to be one hell of a journey, and I just wanted to give you guys a bit of insight into what it is like working on the engineering side of the Nutanix platform, and what a project like this entails.
I want to finish with a special thank you to (in no particular order), Rainer, Alexander, Kasim, Malcolm, Jonathan, and the extended team. It’s been one heck of an experience! 🙂
Do you know how everyone just loves client side Java? Yeah, exactly. That’s why a lot of Nutanix customers will be quite happy with the IPMI firmware update for our latest systems. You will no longer have to rely on java to use the lights-out management, but you can simply use HTML5 to manage your systems.
Unfortunately, this update isn’t available to older systems. After cursing at Java again in my home lab, I decided to see if there was no way around it. Fortunately, I noticed that on GitHub, a developer called “kelleyk” posted a port of noVNC that adds support for ATEN iKVM, which is used in quite a couple of Supermicro servers.
So, after a bit of fiddling, I managed to get this to work on my Mac. First things first, download the fork from here: https://github.com/kelleyk/noVNC
Next up, make sure you have the xcode command line tools installed. If not, just run:
xcode-select --install
Also, since we will need a web socket bridge to forward requests to your IPMI interface (which encrypts traffic), make sure you have a certificate named self.pem, or generate one by issuing:
Once that is done, the rest is simple. Open a terminal and go to the directory where you copied the noVNC fork, and go to the “utils” directory. From there, run the launch.sh shell script, and provide it with the IP-address of your IPMI interface and use the default VNC port as the port number:
./launch.sh --vnc 192.168.10.10:5900
This will launch the script, and give you a link that you can open in your browser:
Using local websockify at ~/noVNC-bmc-support/utils/websockify/run
Starting webserver and WebSockets proxy on port 6080
WebSocket server settings:
 - Listen on :6080
 - Flash security policy server
 - Web server. Web root: /Users/basraayman/Downloads/noVNC-bmc-support
 - SSL/TLS support
 - proxying from :6080 to 192.168.10.10:5900

Navigate to this URL:

 http://Bass-MacBook-Pro-Retina.local:6080/vnc.html?host=Bass-MacBook-Pro-Retina.local&port=6080
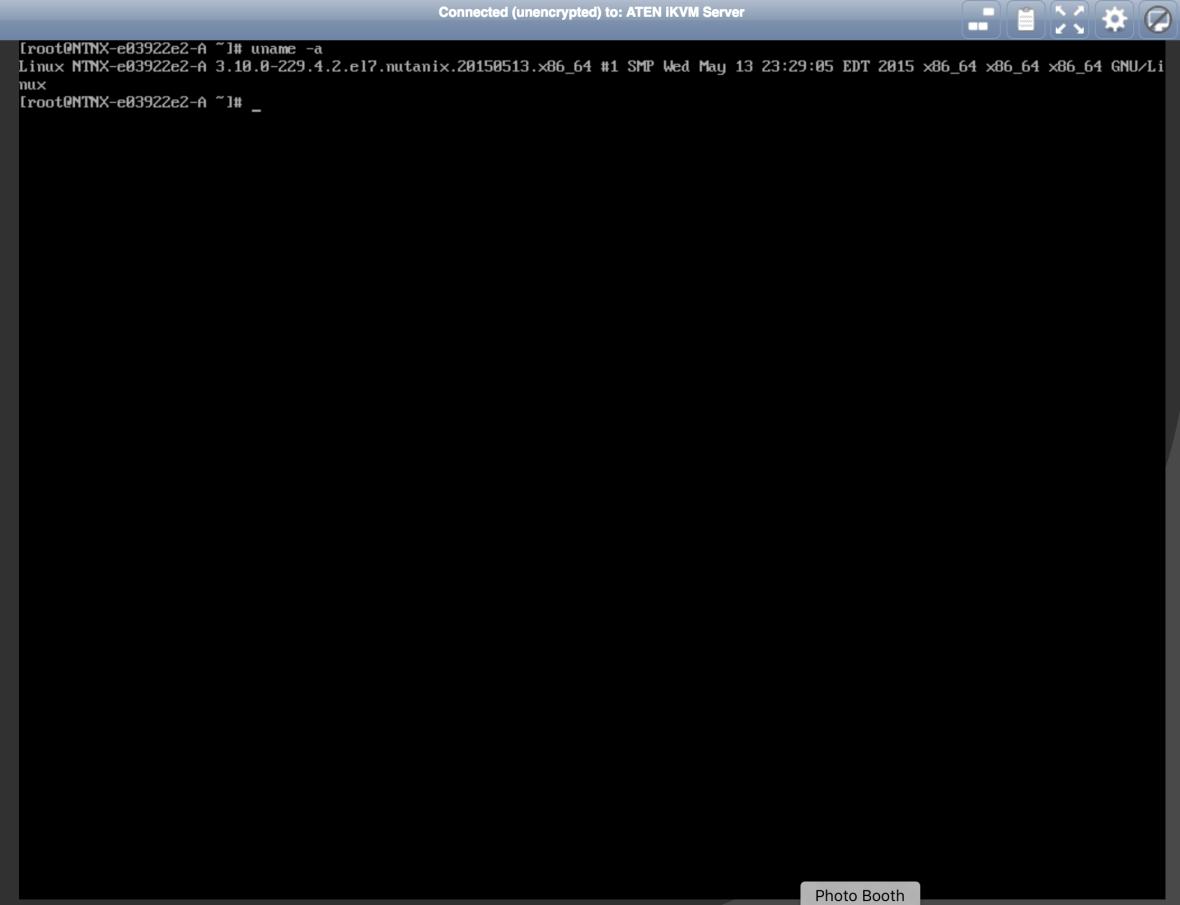
Follow the link in your browser, leave the values as they are, and in the password field, input your IPMI username and password separated by a colon, so in the following format (note that ADMIN is both the default username and password in this case):
ADMIN:ADMIN
Once that is done, click the connect button, and you are now able to connect to the lights-out interface using your browser, no java needed. And while this might not be super ideal (no forwarding of iso images and such), it should make day to day administration a bit easier.
So, give it a whirl, and let me know if this works for you in the comments. 🙂
Nutanix announced version 4.7 of its AOS, basically the operating system for the controller VMs. One of the things that is new, are the so called Acropolis Container Services. Basically allowing the Nutanix cluster to act as in such a way that you can for example use the docker-machine command (with a corresponding driver) to create new Docker instances that deploy automatically on your cluster.
While we are still waiting for the Docker Machine Driver to be posted to our portal, I’ve dug up an internal version of the driver, and decided to test it and post my experiences.
Right now it’s relatively simple to get started. You need your Nutanix cluster running AHV and some working credentials for the cluster. Also, you need a system that has Docker machine installed.
Once you have that, download the Docker machine driver for your platform from Nutanix (once it is posted that is). We should be offering a driver for OSX, Windows and Linux, so you should pretty much be covered.
On OSX the the procedure to get started is relatively simple. Copy the file you downloaded, and if it has an .osx extension in the filename, remove that extension. Modify the file to allow it to be executed (chmod +x), and then move it to the directory that contains your docker-machine executable/binary.
Now, you can start docker-machine and call the Nutanix driver, and that will give you a couple of additional options:
docker-machine create --driver nutanix

Usage: docker-machine create [OPTIONS] [arg...]
 Create a machine

Description:
 Run 'docker-machine create --driver name' to include the create flags
 for that driver in the help text.

Options:
 ....
 --nutanix-endpoint Nutanix management endpoint ip address/FQDN [$NUTANIX_ENDPOINT]
 --nutanix-password Nutanix management password [$NUTANIX_PASSWORD]
 --nutanix-username Nutanix management username [$NUTANIX_USERNAME]
 --nutanix-vm-cores "1" Number of cores per VCPU of the VM to be created [$NUTANIX_VM_CORES]
 --nutanix-vm-cpus "1" Number of VCPUs of the VM to be created [$NUTANIX_VM_CPUS]
 --nutanix-vm-image [--nutanix-vm-image option --nutanix-vm-image option] The name of the VM disks to clone from, for the newly created VM
 --nutanix-vm-mem "1024" Memory in MB of the VM to be created [$NUTANIX_VM_MEM]
 --nutanix-vm-network [--nutanix-vm-network option --nutanix-vm-network option] The name of the network to attach to the newly created VM
 ....
Now, to create for example a VM based on an ISO image that is stored in your image configuration, you simply use one command:
And you can obviously also add things like VM memory and CPU information. Once you hit enter, the driver connects to the Nutanix cluster and tells it what to do.
The result?
And you can manage your systems using docker-machine like you are used to. Now there is obviously more you can do, but I just wanted to give you a quick way to get started. So, have fun playing with it. 🙂
Containers seem to be the hot trend right now. I needed to get some more experience in this area, and instead of working with a single container machine, I actually wanted to get a “quick” distributed setup going. It wasn’t all that quick to start with, but I now have a working setup that can actually be rolled out and scaled in a pretty quick fashion.
Now, I’m assuming you already know what a container is, and have heard about CoreOS. Here are some quick steps to get you started. I’ll start off with the prerequisites:
You will have your Nutanix CE cluster up and running
You have a VLAN set up with IP address management and a DHCP server on Nutanix CE
Your further steps are relatively simple. First off, we will create an etcd master, the most important thing we need is a fixed IP, so define which IP you want to give it. Obviously we could use the CoreOS cluster discovery mechanism and rely on an internet connection, but I decided to just use my own instance instead.
Start off by creating a cloud-config file for your etcd master:
#cloud-config
ssh_authorized_keys:
  - ssh-rsa AAAAB3NzaC1...
coreos:
  etcd2:
    name: etcdserver
    initial-cluster: etcdserver=http://<etcd-vm-ip-here>:2380
    initial-advertise-peer-urls: http://<etcd-vm-ip-here>:2380
    advertise-client-urls: http://<etcd-vm-ip-here>:2379
    # listen on both the official ports and the legacy ports
    # legacy ports can be omitted if your application doesn't depend on them
    listen-client-urls: http://0.0.0.0:2379,http://0.0.0.0:4001
    listen-peer-urls: http://0.0.0.0:2380
 units:
    - name: etcd2.service
    command: start
    - name: 00-eth0.network
    runtime: true
    content: |
      [Match]
      Name=eth0

      [Network]
      DNS=<your-dns-ip-here>
      Address=<etcd-vm-ip-here>/16
      Gateway=<your-gateway-ip-here>
Note that I’ve copied in the public ssh key from my laptop to get easier access to the VM. Now, save this file as a text file called user_data, and create an iso image using the ways described here. Copy that over to your container on CE using sftp to a controller VM on port 2222. You can use Prism credentials to authenticate.
Next step, create a new VM in Acropolis, attach the CoreOS ISO image as your primary CD drive, and the ISO you just created as the second CD drive, and power on the VM
Now, to create the actual CoreOS cluster, you create a second user_data file, that only contains the following:
For quick deployment, I’d create a VM that you use as a template to clone from. Give the VM the newly created file as the secondary drive.
Now, just create some clones, power them on and wait for them to get their IP. You should then be able to ssh into the machine using the “core” user, and check your cluster:
With that, you can start implementing and rolling out your units:
core@CoreOS-1 ~ $ fleetctl load hello.service
Unit hello.service loaded on 1c24fc23.../192.168.96.248

core@CoreOS-1 ~ $ fleetctl list-units
UNIT          MACHINE                    ACTIVE   SUB
hello.service 1c24fc23.../192.168.96.248 inactive dead
Recently my parents switched to a Mac from a PC, and I helped set things up for them. The machine was quite nice, a new iMac Retina, and I helped my dad migrate their old PC to a VM on the new Mac. Now, this entire process is pretty straightforward. You put the Mac and the PC on the same network, input a four digit token (or input an IP and port), then authenticate with a user and password, and things should work.
Unfortunately, that wasn’t quite the case for me. The Windows system wanted to have UAC disable on the Windows 8 Machine, which isn’t a problem, but the error message wouldn’t go away. Problem was, that it was a pretty generic error message “A failure occurred”, without even so much as an error code that made any sense. The log files also didn’t work.
While I was guessing it might be related to a username problem (spaces in the username), I tried several things on the Windows side, and checked the user on the Mac as well. It was then I found out that under OSX Mavericks, you can now enable using an iCloud password, which was already set up (using a screenshot here of my MacBook Pro as an example):
iCloud Password
Long story short, as soon as I used a separate local password for the user, the P2V migration worked like a charm. I enabled the iCloud password again, and the migration wouldn’t go through. Since I wasn’t able to find this in the VMware KB, I figured I might as well share this here.
One of the features that has been announced for Nutanix OS 4.0 (also called NOS), is something called Prism Central.
So what does Prism Central do? Well, perhaps things are more obvious if we speak about the internal name we once used. It was referenced as our Multi-Cluster UI, and that is exactly what it is. Instead of having to open multiple tabs in your browser and switching between tabs to actually manage your Nutanix clusters, you can now open one tab, register multiple clusters, and manage them all from one interface, or get a basic overview of what is going on across all clusters.
First things first: Disclaimer – Keep in mind this is based on an early code version, and things will most likely change before you can download the software.
I spoke to our developers, and received a version to play with, so I’ll walk you through the process. Prism Central comes as an OVF, and you simply deploy this VM in your infrastructure. The requirements for the VM are the following (again, this might change):
8GB RAM

2 vCPUs

260GB disk space
With that configuration, you can monitor 100 nodes while we assume that you can go up to 100 VMs per node.
With that said, the installation itself is quite easy. We deploy the OVF from vCenter: Prism Central – OVF Deployment
We give the VM a name: Prism Central – OVF Deployment – Naming
And follow the normal steps for any OVF. Things like selecting a resource pool, datastore, and then selecting the disk format and network mapping. You will only need one interface, but I’d recommend deploying the Prism Central VM in the same network as your controller VMs. Once that is done, you click on “Finish” and wait for the VM to deploy: Prism Central – OVF Deployment – Finished
Now, my assumption is that we will be changing to the OVA format to make deployment a bit easier. In this version, I still had to configure the IP addresses manually (no DHCP in my network), and deploying from an OVA should make that a breeze, but I will outline the steps I used here anyway.
After connecting to the vSphere console of the VM, we log on to the console using “nutanix” as the user and “nutanix/4u” as the password. Then, you simply edit the file /etc/sysconfig/network-scripts/ifcfg-eth0 and input the IP-address you would like to use. In my case it looks like this:
Simply save the file and restart your network services, and you should now be able to access the machine using your favorite ssh client. Now there is one thing left to do (and again, I’m assuming this should no longer be there in a final release, just trying to be complete):
Which should result in something like this: nutanix@NTNX-10-64-20-110-A-CVM:~$ cluster -f --cluster_function_list="multicluster" -s 10.64.20.110 create
2014-04-17 05:50:37 INFO cluster:1469 Executing action create on SVMs 10.64.20.110
2014-04-17 05:50:37 INFO cluster:593 Discovered node:
ip: 10.64.20.110
rackable_unit_serial: 10-64-20-110
node_position: A
node_uuid: ed763914-2c16-4aff-9b6b-d4ea962af9fe
2014-04-17 05:50:37 INFO cluster:632 Configuring Zeus mapping ({u'10.64.20.110': 1}) on SVM node 10.64.20.110
2014-04-17 05:50:37 INFO cluster:650 Creating cluster with SVMs: 10.64.20.110
2014-04-17 05:50:37 INFO cluster:654 Disable fault tolerance for 1-node cluster
2014-04-17 05:50:39 INFO cluster:687 Waiting for services to start
Waiting on 10.64.20.110 (Up, ZeusLeader) to start: ConnectionSplicer Medusa DynamicRingChanger Pithos Prism AlertManager Arithmos SysStatCollector
Waiting on 10.64.20.110 (Up, ZeusLeader) to start: ConnectionSplicer Medusa DynamicRingChanger Pithos Prism AlertManager Arithmos SysStatCollector
Waiting on 10.64.20.110 (Up, ZeusLeader) to start: DynamicRingChanger Pithos Prism AlertManager Arithmos SysStatCollector
...
...
...
Waiting on 10.64.20.110 (Up, ZeusLeader) to start: DynamicRingChanger Pithos Prism AlertManager Arithmos SysStatCollector
Waiting on 10.64.20.110 (Up, ZeusLeader) to start: AlertManager Arithmos SysStatCollector
Waiting on 10.64.20.110 (Up, ZeusLeader) to start:
The state of the cluster: start
Lockdown mode: Enabled
CVM: 10.64.20.110 Up, ZeusLeader
Zeus UP [14429, 14442, 14443, 14447, 14453, 14466]
Scavenger UP [14660, 14675, 14676, 14793]
ConnectionSplicer UP [14690, 14703]
Medusa UP [14760, 14775, 14776, 14780, 14940]
DynamicRingChanger UP [15946, 15973, 15974, 15986]
Pithos UP [15950, 15980, 15981, 15994]
Prism UP [15969, 15995, 15996, 16004]
AlertManager UP [16019, 16049, 16051, 16079, 16102]
Arithmos UP [16029, 16080, 16081, 16099]
SysStatCollector UP [16041, 16092, 16093, 16178]
2014-04-17 05:51:07 INFO cluster:1531 Success!
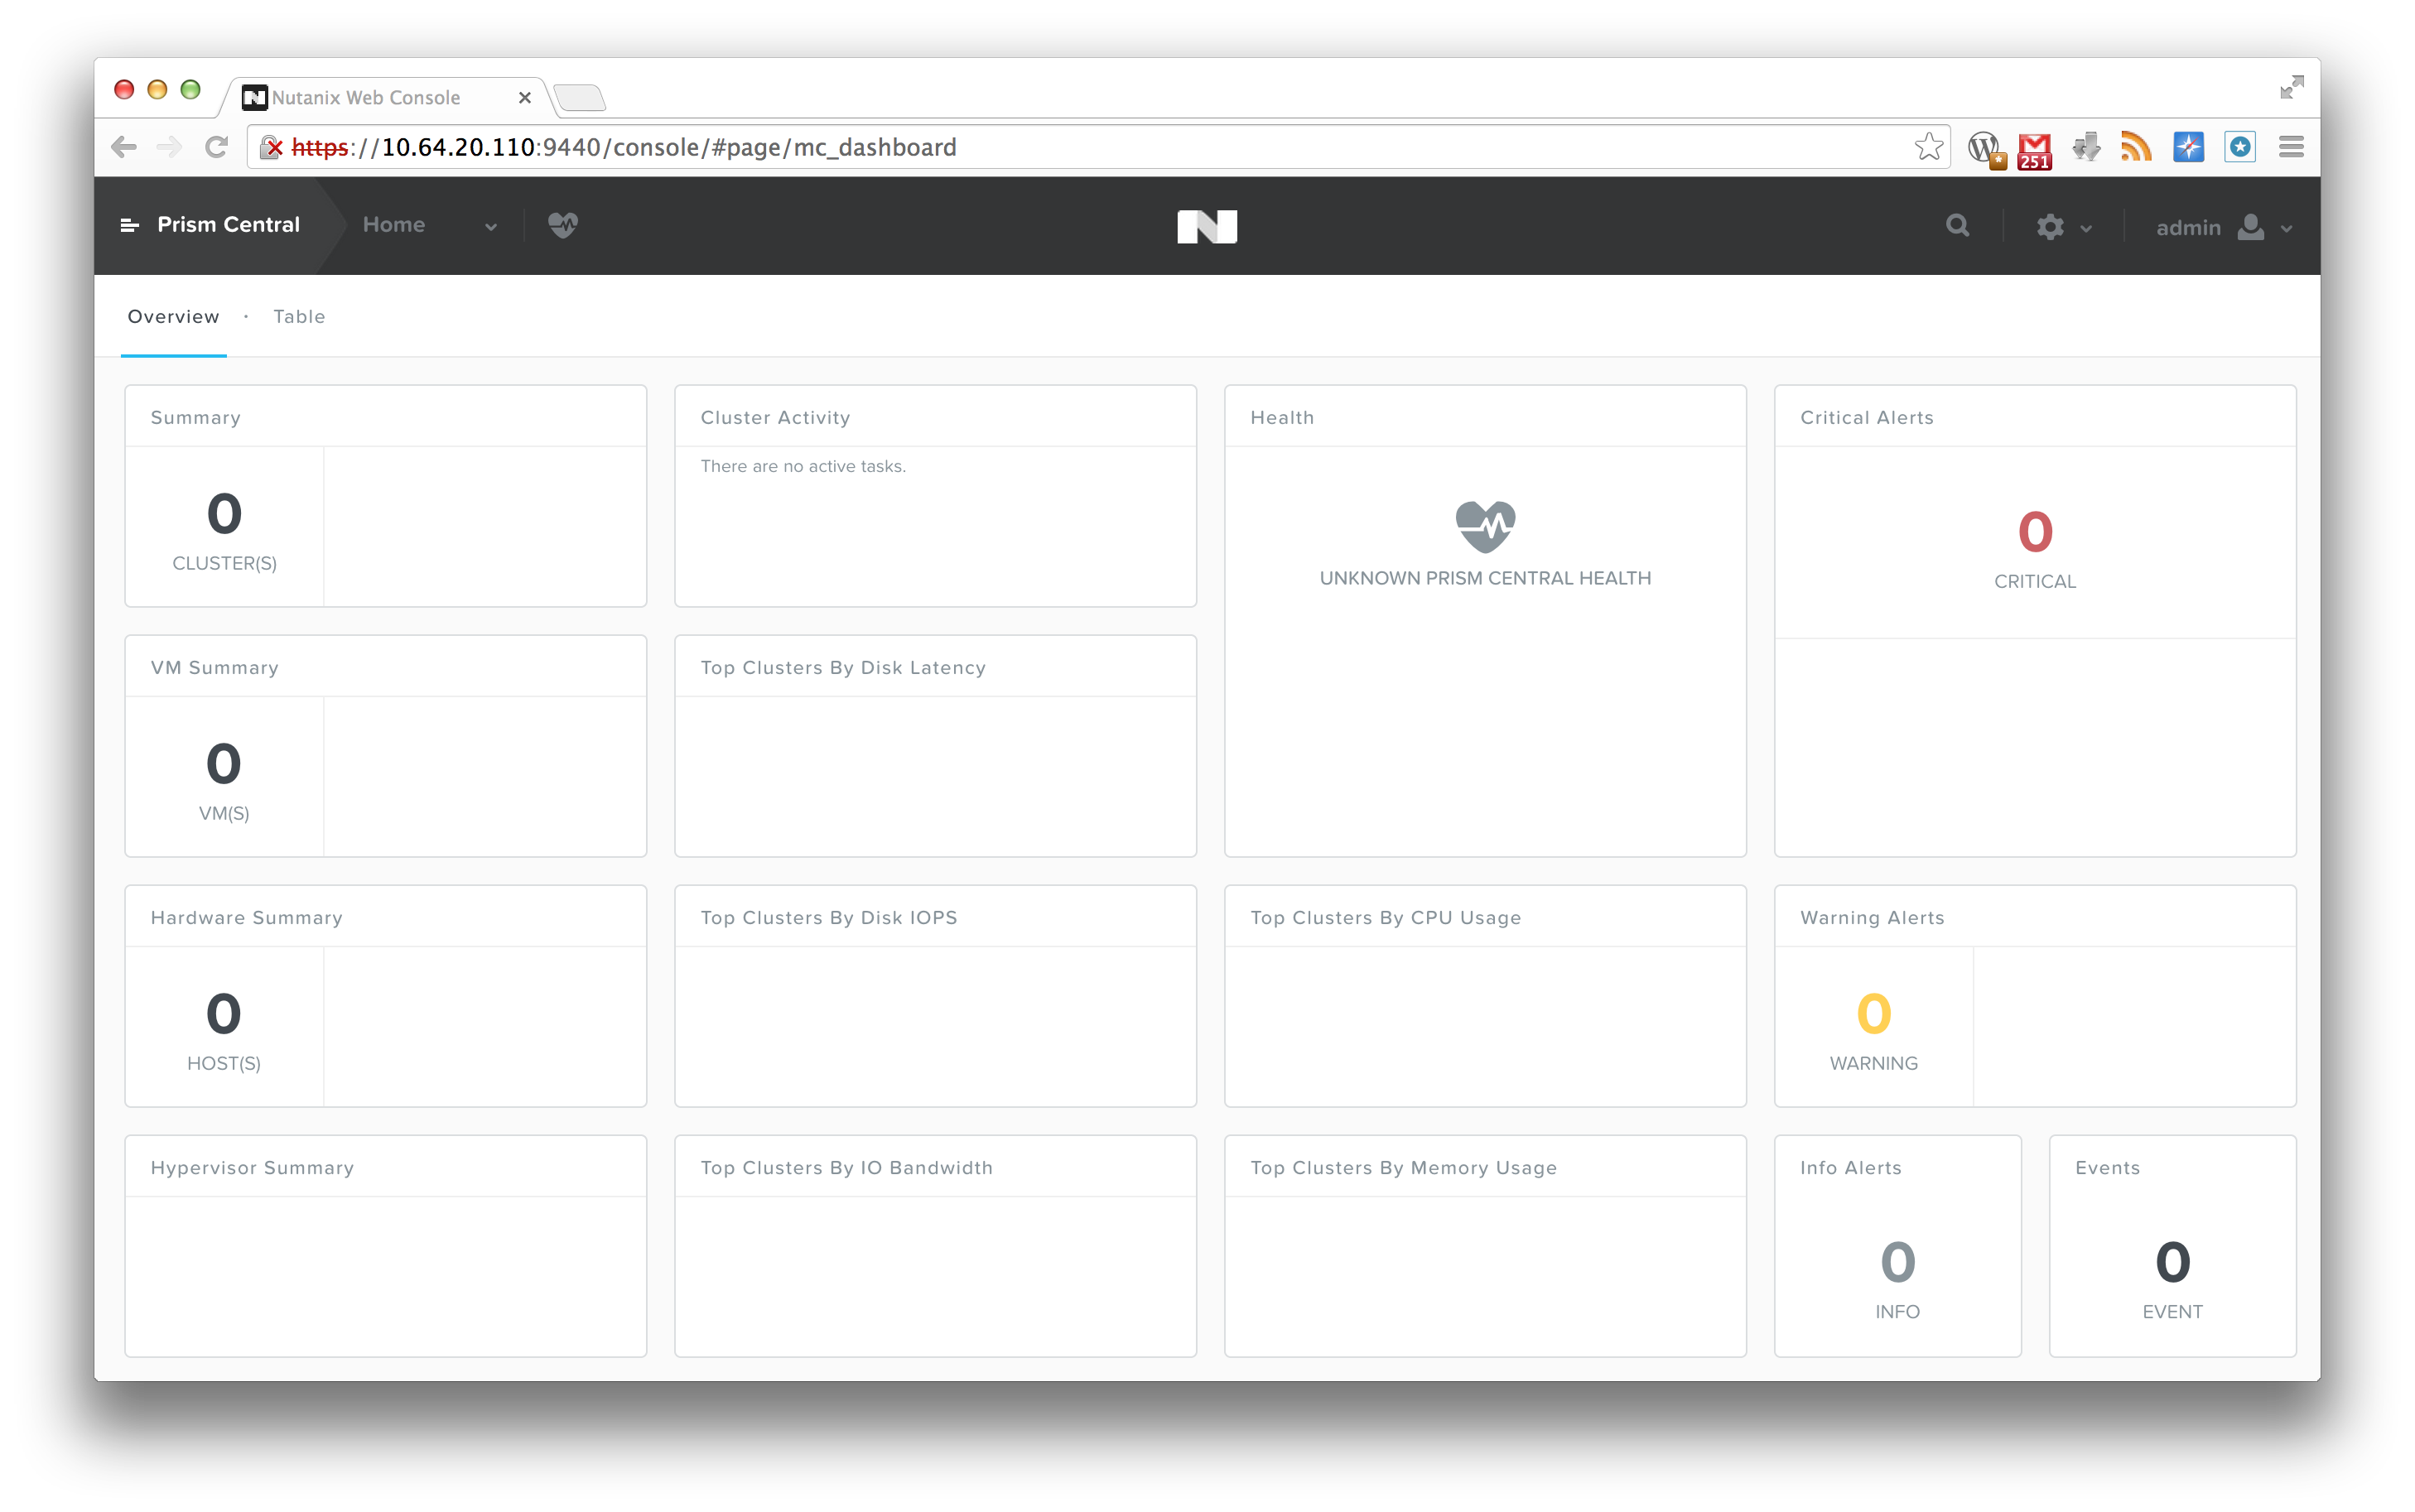
And voila! You can now log on to your instance of Prism Central! Prism Central
As you can see, it looks quite the same as the regular 4.0 version, except that if you click on the top left “Prism Central” text, a menu will fold out on the left hand side. But, since we want to monitor a cluster, let’s go ahead and register a cluster.
To do so, just connect to your NOS 4.0 cluster, and click on the small gear symbol on the top right corner, and select “Prism Central Registration”. There, fill out the Prism Central IP, the username and password for Prism Central, and click on “Save”
Prism Central – Registration
If all goes well, the cluster registers, and you will see an event in your Prism Central stating that a user has been added (we support single sign on in Prism Central), and that a cluster has been added to Multicluster. And, you should now be able to see the new cluster that was registered in Prism Central:
Prism Central – Cluster registered
To now manage that cluster, simply click on Prism Central on the top left, and then select the cluster from the list on the left hand side: Prism Central – Cluster selection
From there on, you can manage the cluster just like you would in your regular interface. My colleague Suda Srinivasan was kind enough to create a video that walks you through the interface:
So, that’s it for now. If you have any questions, feel free to let me know.
I’m getting more and more customer requests that are looking at alternatives for VMware, and are considering a different hypervisor. Since I’m more of a VMware guy, but I am always willing to learn new stuff, I figured I might as well share some info on how to set up the Nutanix cluster on KVM, and create an initial virtual machine.
I’m assuming you have at least some Linux knowledge, and that you were able to get the hosts and the controller VMs configured with an IP address. After that, the basic setup is pretty much the same. Visit the cluser_init page using the IPv6 link local address, which is in the format:
Which looks something like this: Nutanix – Cluster init
Fill out the information in that window, and click the “Create” button. Once that is done, you will see some messages popping up underneath: Configuring IP addresses on node 13SM15400003/A...
Configuring IP addresses on node 13SM15400003/B...
Configuring IP addresses on node 13SM15400003/C...
Configuring the Hypervisor DNS settings on node 13SM15400003/A...
Configuring the Hypervisor DNS settings on node 13SM15400003/B...
Configuring the Hypervisor DNS settings on node 13SM15400003/C...
Configuring the Hypervisor NTP settings on node 13SM15400003/A...
Configuring the Hypervisor NTP settings on node 13SM15400003/B...
Configuring the Hypervisor NTP settings on node 13SM15400003/C...
Configuring Zeus on node 13SM15400003/A...
Configuring Zeus on node 13SM15400003/B...
Configuring Zeus on node 13SM15400003/C...
Initializing cluster...
not ready, trying again in 5 seconds...
Initializing cluster...
Cluster successfully initialized!
Initializing the CVM DNS and NTP servers...
Successfully updated the CVM NTP and DNS server list
What we are doing, is actually configuring the cluster with all the IP addresses, writing the cluster configuration to the underlying services, and starting the cluster for you. Give it a couple of minutes (usually 2 or 3 minutes will suffice), and you can now log on to the IP address of a controller VM, or the “Cluster External IP” that you put in, using the default username and password:
Nutanix – Cluster logon
By the way, I disabled the background video by simply adding “?novideo=true” to the logon URL. This disables the video, and makes logon a bit faster, especially when working via a link that might not have the bandwidth that you would prefer.
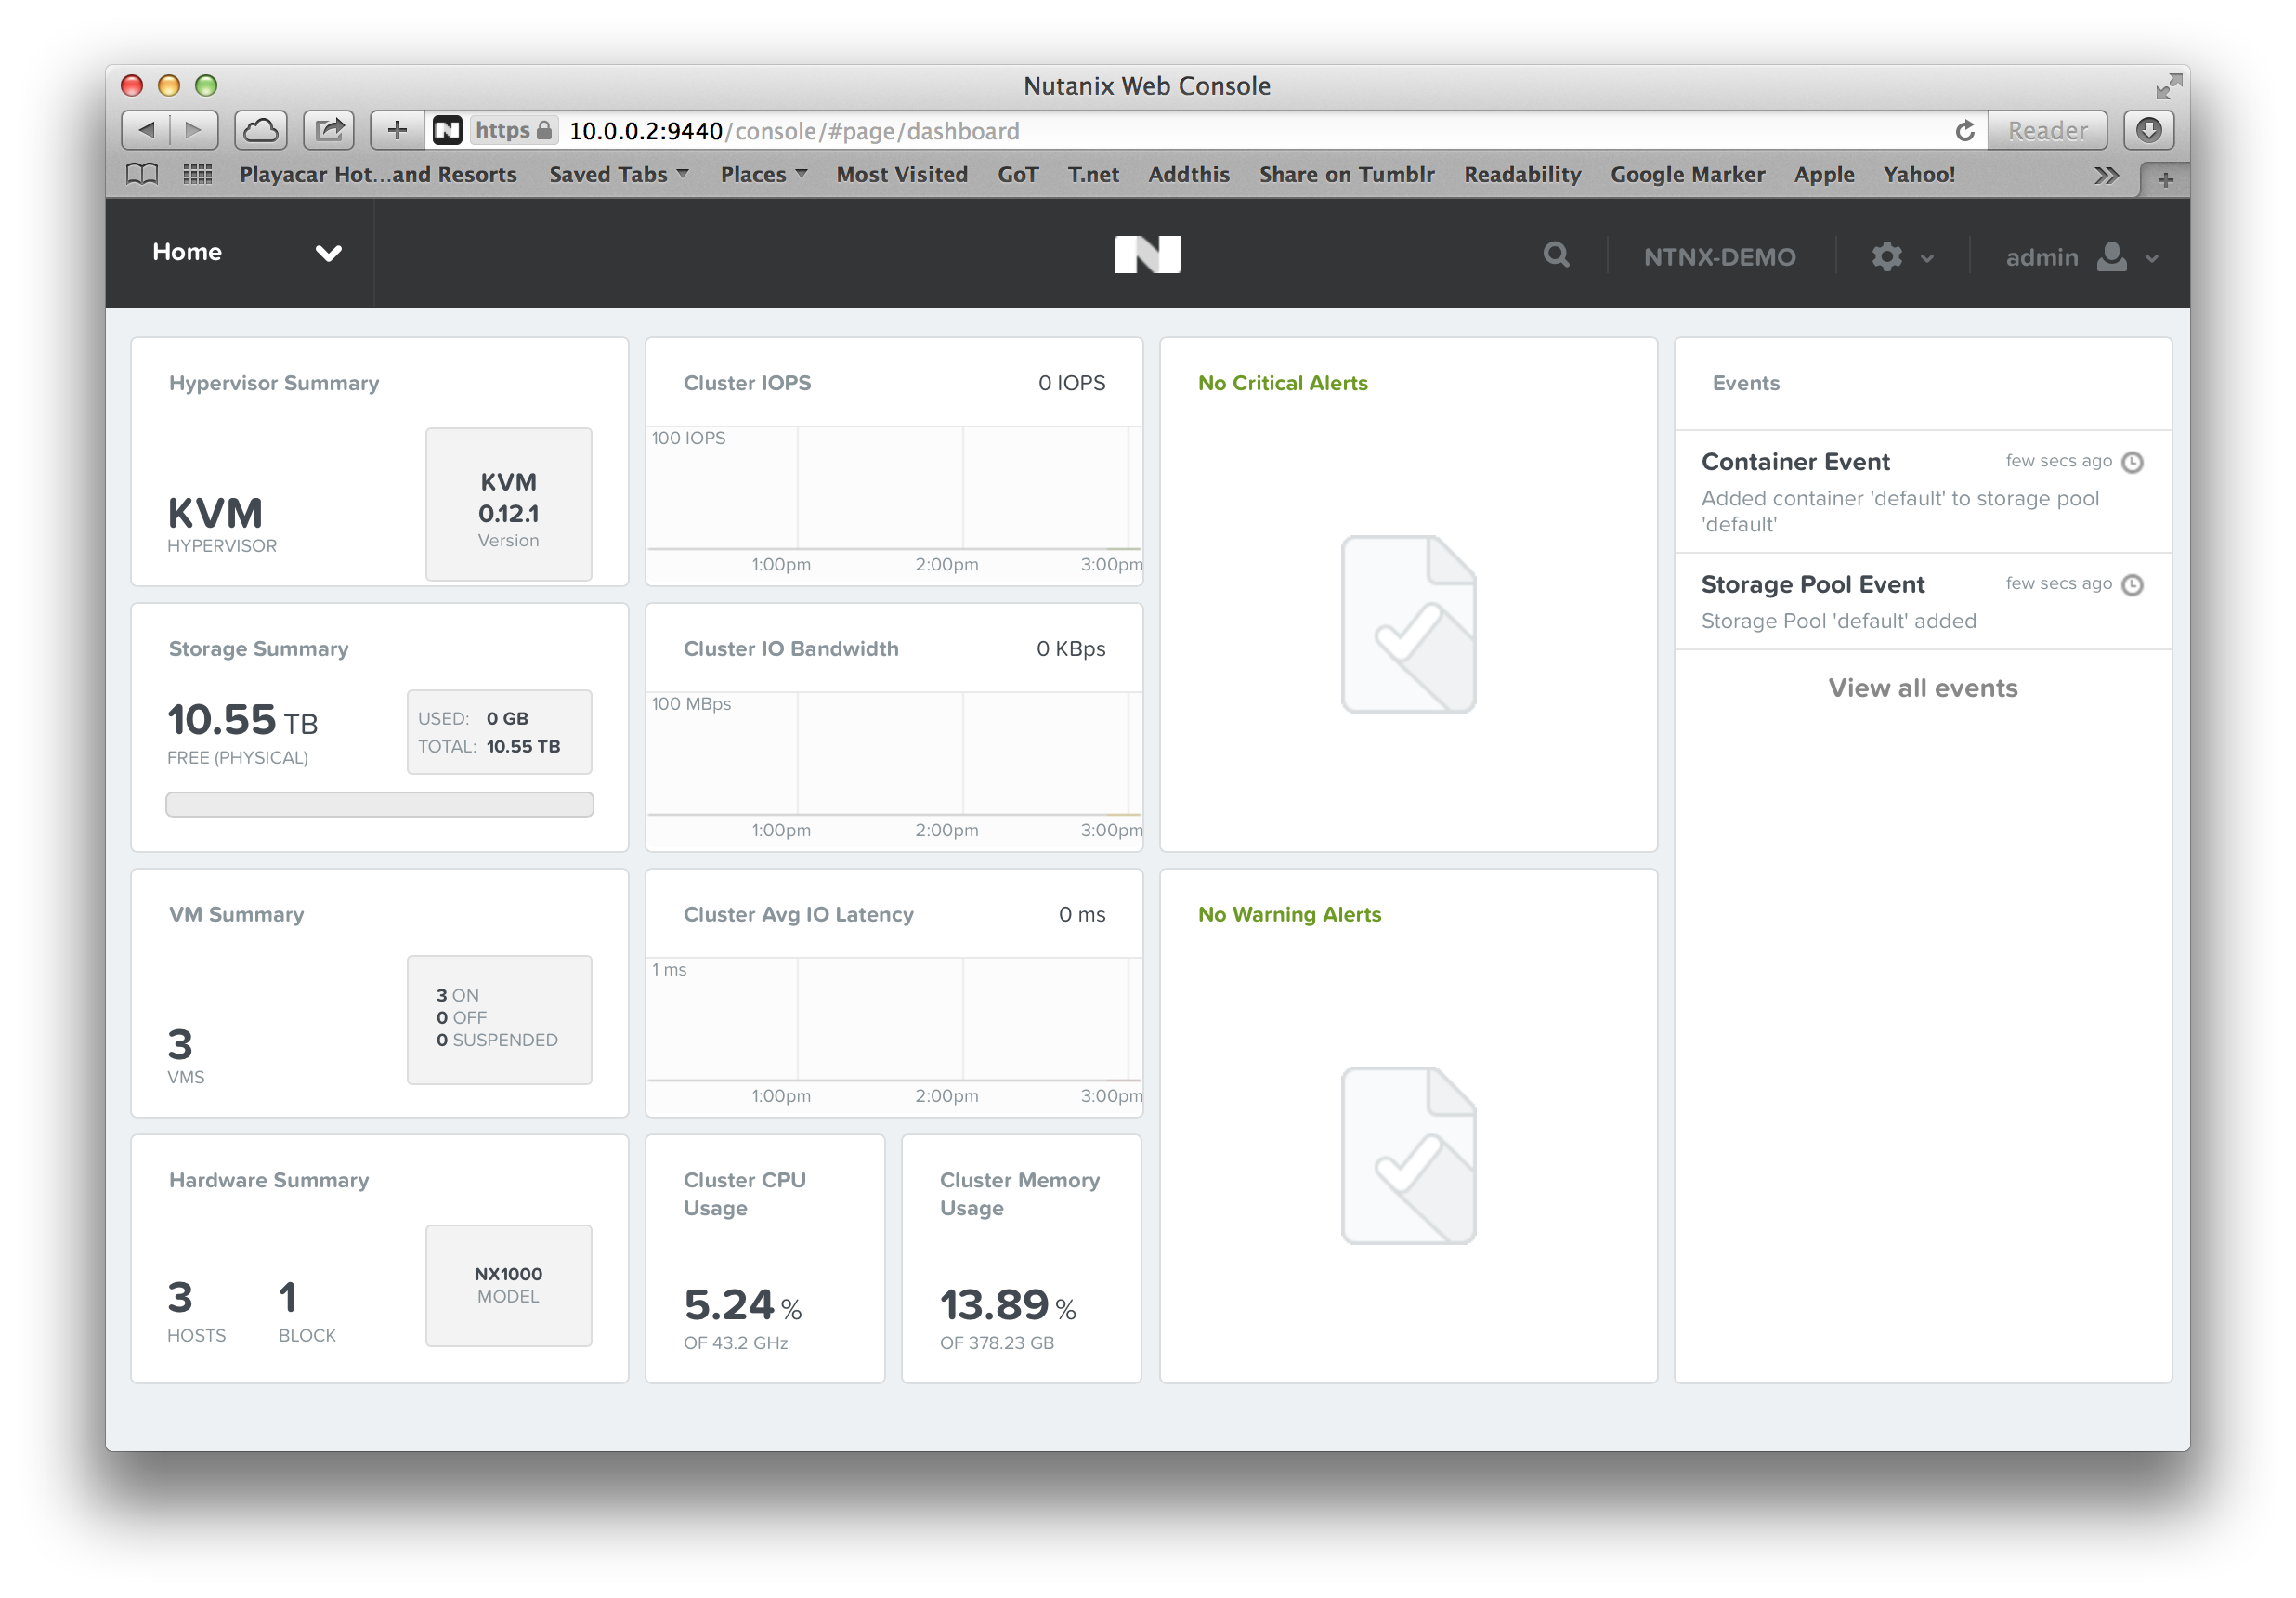
I then created a storage pool by the name of “default”, and created a container with the same name. Once that is done, your cluster is ready for its first VMs.
Nutanix – Cluster ready
Now, Nutanix relies on the management tools that a Hypervisor offers. In the case of vSphere, this would be vCenter. With KVM, or in our case KVM on CentOS, the selection is a bit more limited. Especially, since we make use of the Open Virtual Switch. That means, right now, we use libvirt as the management API, and wrote some extensions of our own. After all, your VMs will be located on storage that is being provided by Nutanix, so it would be good if we gave you some commands to make use of that storage, right? 😉
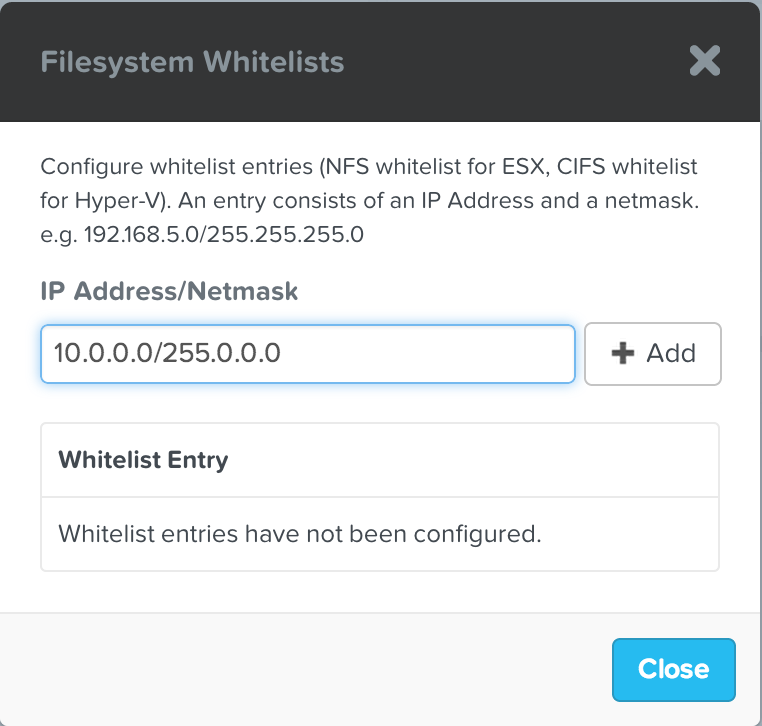
If we want to start the installation of a VM, we are first going to need an installation medium that we can use. So, I’m going to whitelist the default container I just created, and copy over a Ubuntu iso image: Nutanix – Filesystem whitelist
Since you want to be able to see what was uploaded to the container, you can check from any of the controller VMs what is on there: nutanix@NTNX-13SM15400003-A-CVM:10.0.0.30:~$ nfs_ls
ubuntu-13.04-server-amd64.iso
Now, just pick the host that you want to use for your VM, and create the VM using the virt_install command. For example: virt_install --name bas_ubuntu_test --disk 32 --cdrom /default/ubuntu-13.04-server-amd64.iso --nic VM-Network --vcpus 2 --ram 4096
Which would result in the following: nutanix@NTNX-13SM15400003-A-CVM:10.0.0.30:~$ virt_install --name bas_ubuntu_test --disk 32 --cdrom /default/ubuntu-13.04-server-amd64.iso --nic VM-Network --vcpus 2 --ram 4096
2014-02-27 15:26:54 INFO batch_worker.py:211 Preparing nutanix disks: 0%
2014-02-27 15:26:57 INFO batch_worker.py:211 Preparing nutanix disks: 50%
2014-02-27 15:26:57 INFO batch_worker.py:211 Preparing nutanix disks: 100%
2014-02-27 15:26:57 INFO batch_worker.py:211 Creating libvirt storage pools: 0%
2014-02-27 15:26:59 INFO batch_worker.py:211 Creating libvirt storage pools: 50%
2014-02-27 15:26:59 INFO batch_worker.py:211 Creating libvirt storage pools: 100%
2014-02-27 15:26:59 INFO kvm_domain_template.py:184 Running virt-install
Now you have multiple options. You could connect using virt-manager: Nutanix – virt-manager
Or, alternatively, you could open up the VNC port that the VM is running on (or disable iptables alltogether), and use your favorite VNC client to manage the newly created VM: Nutanix – VNC
Most of the commands that Nutanix implemented come with a syntax that is very similar to the native libvirt syntax, but the commands will be named with an underscore instead of a dash. For example live migration of a VM can be performed using: virt_migrate --vm bas_ubuntu_test --destination 10.0.0.20 --live
That’s it for a rough overview. If you have any questions, feel free to contact your local SE, or leave a note in the comments. 🙂
I just received word that because of VMworld, there are some discount codes for the VCP and VCAP certifications. To use the discount, you need to register for the exam at the Pearson VUE website. Don’t forget that the VCAP certifications requires you to register for the exam on the VMware website before scheduling the test on the Pearson VUE website. Just click this link here, go to the certification you want to take, and click the “Register for the exam” button at the top.
Once you receive the clearance, there will be an option at the top of the Pearson Website (where you input your payment details), where you can apply the discount code.
The discount code “VWSF50” will work for the following exams:
VCP-DCV
VCP-DT
VCP-Cloud
VMware IAAS
VMware View
The discount code “VWSFADV50” will work for the following exams:
VCAP-DCD
VCAP-DCA
VCAP-CID
VCAP-CIA
VCAP-DTD
To be eligible for the discount, your test must be scheduled by August 29th 2013, and taken by October 31st 2013.
Good luck on the tests if you decide to schedule one! 🙂