
Nutanix has released a product called “Karbon” which according to the website allows you to:
Get a production-ready Kubernetes Cluster up and running in 20 minutes.
Now, I’ll leave it up to the marketing people to verify if it takes 20 minutes or not. But once you have your cluster up and running, our developers assumed that anyone connecting to the Karbon cluster will use a Linux based operating system.
Since that isn’t the case for everyone, and I like to try other things, I wanted to see if I can connect to the Karbon cluster using Microsoft Windows as the operating system. This works fine, but there will be a couple of things you need to do.
First, log on to your Karbon cluster, select the cluster that you want to connect to, and from the “actions” menu at the top select the “SSH Access option”, which will give you a dialog window with a download link:
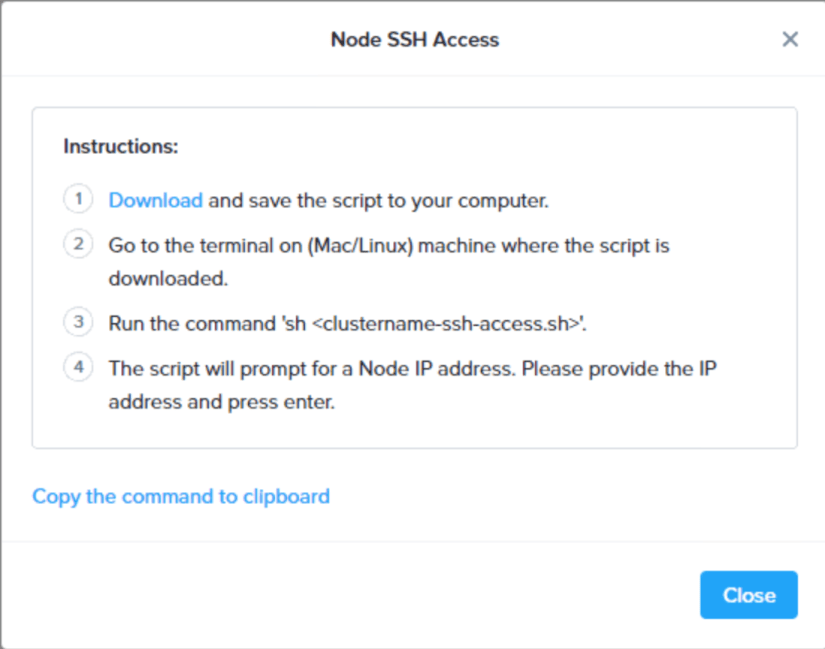
Download the file in a location of your choice. Next, open the file, but open it in an editor that is capable of properly handling files created on Linux. This is important since there is a difference in the way a press of the “Enter” key is written in text files between the operating systems.
Once the file is opened, you will see two larger blocks of information. One part can be found in the “private_key” part of the file, and one in the “user_cert” part of the file. First off, select all of the lines after:
private_key='
So essentially you are copying everything from (and including):
-----BEGIN RSA PRIVATE KEY-----
down to (and including):
-----BEGIN RSA PRIVATE KEY-----
But make sure you do not include the single quote at the start and the end. Take this and save it as a new file, for example called “karbon-user”
Then, do the same thing for everything following:
user_cert='
And copy everything starting with “ssh-rsa-cert-v01” down to the last character of that long string, but do not include the final single quote. Save that as a file for example called “karbon-user-cert.pub”
Next up, start PowerShell on your Windows system as an administrator and start the ssh-agent service:
Start-Service ssh-agent
And if you want to have it start automatically:
Set-Service ssh-agent -StartupType Automatic
Then add your users private key file that you save before:
ssh-add C:\Users\Bas\Downloads\karbon-user
Obviously replace the path above to the location on your system 😉
Next, the only thing you have to do is ssh into the IP address of your Karbon VM while passing the public key we also saved before:
ssh -i C:\Users\Bas\Downloads\karbon-user-cert.pub nutanix@192.168.0.5
Again, replace the path to the file, and replace the IP to your VMs IP. But once that is going, you can connect to your Karbon VMs and work with them without having to set up a Linux system. 🙂

