Nutanix has released a product called “Karbon” which according to the website allows you to:
Get a production-ready Kubernetes Cluster up and running in 20 minutes.
Now, I’ll leave it up to the marketing people to verify if it takes 20 minutes or not. But once you have your cluster up and running, our developers assumed that anyone connecting to the Karbon cluster will use a Linux based operating system.
Since that isn’t the case for everyone, and I like to try other things, I wanted to see if I can connect to the Karbon cluster using Microsoft Windows as the operating system. This works fine, but there will be a couple of things you need to do.
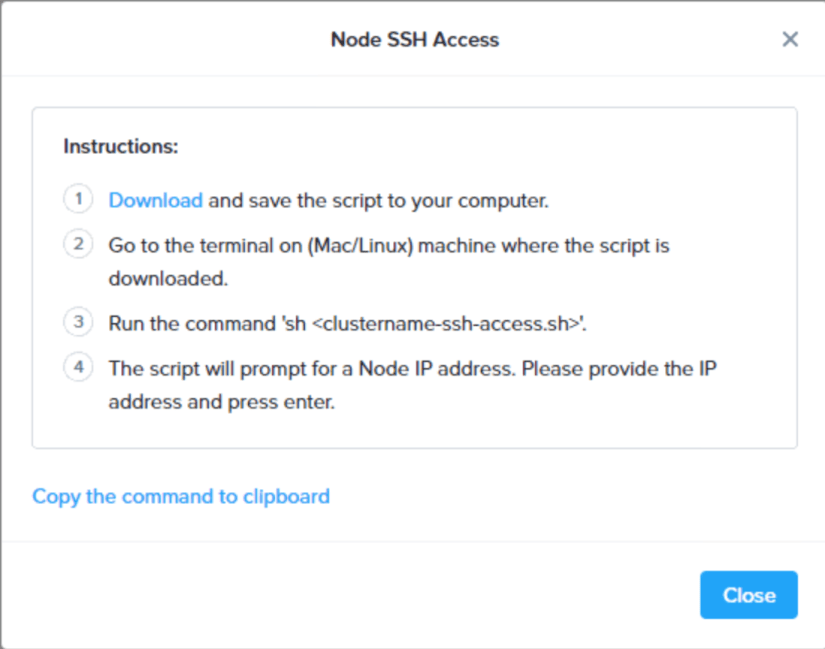
First, log on to your Karbon cluster, select the cluster that you want to connect to, and from the “actions” menu at the top select the “SSH Access option”, which will give you a dialog window with a download link:
Download the file in a location of your choice. Next, open the file, but open it in an editor that is capable of properly handling files created on Linux. This is important since there is a difference in the way a press of the “Enter” key is written in text files between the operating systems.
Once the file is opened, you will see two larger blocks of information. One part can be found in the “private_key” part of the file, and one in the “user_cert” part of the file. First off, select all of the lines after:
private_key='
So essentially you are copying everything from (and including):
-----BEGIN RSA PRIVATE KEY-----
down to (and including):
-----BEGIN RSA PRIVATE KEY-----
But make sure you do not include the single quote at the start and the end. Take this and save it as a new file, for example called “karbon-user”
Then, do the same thing for everything following:
user_cert='
And copy everything starting with “ssh-rsa-cert-v01” down to the last character of that long string, but do not include the final single quote. Save that as a file for example called “karbon-user-cert.pub”
Next up, start PowerShell on your Windows system as an administrator and start the ssh-agent service:
Start-Service ssh-agent
And if you want to have it start automatically:
Set-Service ssh-agent -StartupType Automatic
Then add your users private key file that you save before:
ssh-add C:\Users\Bas\Downloads\karbon-user
Obviously replace the path above to the location on your system 😉
Next, the only thing you have to do is ssh into the IP address of your Karbon VM while passing the public key we also saved before:
Again, replace the path to the file, and replace the IP to your VMs IP. But once that is going, you can connect to your Karbon VMs and work with them without having to set up a Linux system. 🙂
To say my last blog post is “a while ago” would a grave understatement. Unfortunately, I’ve mainly been busy with something that was entirely new for Nutanix, and with the amount of work involved and the sensitive nature of what I was working on, there was relatively little room left to blog. Especially since I usually ended up blogging about stuff, I stumbled upon while doing my job or researching.
This all started with me changing from my presales focussed role to our internal “Solutions & Performance Engineering” team, which focusses on the business-critical applications running on the Nutanix platform. In essence, those applications that are the lifeblood of a company. Applications which, if they are unavailable, will cost the company significant amounts of money.
One of those applications is SAP, or more specifically the SAP HANA in-memory database. My colleagues (mainly Kasim Hansia, Rainer Wacker and Alexander Thoma) had already been doing a great job, and all of the SAP applications were certified to run on the Nutanix platform in November 2016. The big question was always “When can we run SAP HANA on Nutanix?”.
Working on the answer to this question is what I’ve been busy with the last year or so. While I won’t bother you with the specific details on the business side of things, I do want to take a bit of time to show what it’s like to go through the process of validating a new application.
First off, the SAP HANA in-memory database is an application that scales to levels that many people won’t ever see in action. You can run HANA in two ways. You either scale up the resources of a single server, for example running with up to 20TB of memory, or you can scale out by adding multiple servers and distributing the load across all servers.
Now, SAP has given the customer two options to select hardware to run SAP HANA. One is an “appliance model” where you choose a configuration as a whole, and everything will run in a pre-tested and validated fashion. You are ensured of a specific behavior of the whole system while running your application. The other option is something called “Tailored Data Center Integration” or TDI in short, where in essence you select your hardware from a hardware compatibility list and have the freedom to mix and match.
What we have done is work with SAP to introduce a new third category called “Hyperconverged Infrastructure” or HCI. The HCI category assumes that we are running SAP HANA in a virtualized fashion, and “collapse” several infrastructure components such as compute and storage to an integrated system.
The limitations on the maximum sizes for this category are smaller than for the other two categories, but the requirements that are in place for this certification do not offer much more leeway. For example, a storage test to ensure storage performance, where initially log overwrite operations needed to have latency <= 400 microseconds (this changed later on). Another example is a test suite of close to 700 tests that emulate real-world issues, and the performance delta is then compared to a bare-metal installation, with only a specific maximum performance delta between the two giving you a passing grade.
All this meant that I had my work cut out for me from the start. We started off working with a server model that wasn’t qualified before, before switching to the validation hardware, namely a Lenovo SR950. A big four-socket server with the fastest CPUs we could use, namely the Intel Xeon Platinum 8180M Processors, 3072 GB of RAM, 3.84TB SSDs and 1.6 TB NVMes.
Now, as much as Nutanix is a software company, we do strictly check that hardware meets specific prerequisites to ensure a smooth user experience and to make sure that certain performance metrics are a given. The issue is that all of the checks and functionality in place didn’t work for this new hardware. Simple things like making the status indicator LED for the NVMe light up, or mapping the physical drive locations back to the diagram view in Prism. It meant modifying Python files that handle how hardware is accessed, packaging everything back up into Python egg files, restarting services and then magically seeing drives that the system was able to access. Or passing through NICs so that we could test with “RDMA over Converged Ethernet” or RoCE, and changing BIOS settings to ensure maximum performance.
And while pushing the underlying hardware to its limits, it also meant we had to dive deep, and I mean very deep, into the software side of things. From things like experimenting with c-states on the CPU and NIC multiqueueing in the virtual machines, down to changing parameters in our product, ensuring that specific CPU features are passed through, the pinning of virtual CPUs to their physical location or making changes to how often a vmexit instruction is called.
I can’t go into all of the specific details since some of it is Nutanix’ intellectual property, but I’ll check what I can share in future posts, and if you have any specific questions, please ask them, and I’ll try to answer as best I can. What I can say is that we pushed the limits of our platform and quite a couple of the things we found are going to be implemented back into the product, and I expect a lot of those changes to show up in the release notes of an upcoming release.
Fact is, I learned a ton of new things, and this all culminated in our validation for pre-production use of SAP HANA on Nutanix AHV as announced in https://www.nutanix.com/2018/06/05/finally-can-talk-sap-hana-nutanix/, and we are working full steam ahead on the last steps to get production support. It was and continues to be one hell of a journey, and I just wanted to give you guys a bit of insight into what it is like working on the engineering side of the Nutanix platform, and what a project like this entails.
I want to finish with a special thank you to (in no particular order), Rainer, Alexander, Kasim, Malcolm, Jonathan, and the extended team. It’s been one heck of an experience! 🙂
Recently my parents switched to a Mac from a PC, and I helped set things up for them. The machine was quite nice, a new iMac Retina, and I helped my dad migrate their old PC to a VM on the new Mac. Now, this entire process is pretty straightforward. You put the Mac and the PC on the same network, input a four digit token (or input an IP and port), then authenticate with a user and password, and things should work.
Unfortunately, that wasn’t quite the case for me. The Windows system wanted to have UAC disable on the Windows 8 Machine, which isn’t a problem, but the error message wouldn’t go away. Problem was, that it was a pretty generic error message “A failure occurred”, without even so much as an error code that made any sense. The log files also didn’t work.
While I was guessing it might be related to a username problem (spaces in the username), I tried several things on the Windows side, and checked the user on the Mac as well. It was then I found out that under OSX Mavericks, you can now enable using an iCloud password, which was already set up (using a screenshot here of my MacBook Pro as an example):
iCloud Password
Long story short, as soon as I used a separate local password for the user, the P2V migration worked like a charm. I enabled the iCloud password again, and the migration wouldn’t go through. Since I wasn’t able to find this in the VMware KB, I figured I might as well share this here.
One of the features that has been announced for Nutanix OS 4.0 (also called NOS), is something called Prism Central.
So what does Prism Central do? Well, perhaps things are more obvious if we speak about the internal name we once used. It was referenced as our Multi-Cluster UI, and that is exactly what it is. Instead of having to open multiple tabs in your browser and switching between tabs to actually manage your Nutanix clusters, you can now open one tab, register multiple clusters, and manage them all from one interface, or get a basic overview of what is going on across all clusters.
First things first: Disclaimer – Keep in mind this is based on an early code version, and things will most likely change before you can download the software.
I spoke to our developers, and received a version to play with, so I’ll walk you through the process. Prism Central comes as an OVF, and you simply deploy this VM in your infrastructure. The requirements for the VM are the following (again, this might change):
8GB RAM

2 vCPUs

260GB disk space
With that configuration, you can monitor 100 nodes while we assume that you can go up to 100 VMs per node.
With that said, the installation itself is quite easy. We deploy the OVF from vCenter: Prism Central – OVF Deployment
We give the VM a name: Prism Central – OVF Deployment – Naming
And follow the normal steps for any OVF. Things like selecting a resource pool, datastore, and then selecting the disk format and network mapping. You will only need one interface, but I’d recommend deploying the Prism Central VM in the same network as your controller VMs. Once that is done, you click on “Finish” and wait for the VM to deploy: Prism Central – OVF Deployment – Finished
Now, my assumption is that we will be changing to the OVA format to make deployment a bit easier. In this version, I still had to configure the IP addresses manually (no DHCP in my network), and deploying from an OVA should make that a breeze, but I will outline the steps I used here anyway.
After connecting to the vSphere console of the VM, we log on to the console using “nutanix” as the user and “nutanix/4u” as the password. Then, you simply edit the file /etc/sysconfig/network-scripts/ifcfg-eth0 and input the IP-address you would like to use. In my case it looks like this:
Simply save the file and restart your network services, and you should now be able to access the machine using your favorite ssh client. Now there is one thing left to do (and again, I’m assuming this should no longer be there in a final release, just trying to be complete):
Which should result in something like this: nutanix@NTNX-10-64-20-110-A-CVM:~$ cluster -f --cluster_function_list="multicluster" -s 10.64.20.110 create
2014-04-17 05:50:37 INFO cluster:1469 Executing action create on SVMs 10.64.20.110
2014-04-17 05:50:37 INFO cluster:593 Discovered node:
ip: 10.64.20.110
rackable_unit_serial: 10-64-20-110
node_position: A
node_uuid: ed763914-2c16-4aff-9b6b-d4ea962af9fe
2014-04-17 05:50:37 INFO cluster:632 Configuring Zeus mapping ({u'10.64.20.110': 1}) on SVM node 10.64.20.110
2014-04-17 05:50:37 INFO cluster:650 Creating cluster with SVMs: 10.64.20.110
2014-04-17 05:50:37 INFO cluster:654 Disable fault tolerance for 1-node cluster
2014-04-17 05:50:39 INFO cluster:687 Waiting for services to start
Waiting on 10.64.20.110 (Up, ZeusLeader) to start: ConnectionSplicer Medusa DynamicRingChanger Pithos Prism AlertManager Arithmos SysStatCollector
Waiting on 10.64.20.110 (Up, ZeusLeader) to start: ConnectionSplicer Medusa DynamicRingChanger Pithos Prism AlertManager Arithmos SysStatCollector
Waiting on 10.64.20.110 (Up, ZeusLeader) to start: DynamicRingChanger Pithos Prism AlertManager Arithmos SysStatCollector
...
...
...
Waiting on 10.64.20.110 (Up, ZeusLeader) to start: DynamicRingChanger Pithos Prism AlertManager Arithmos SysStatCollector
Waiting on 10.64.20.110 (Up, ZeusLeader) to start: AlertManager Arithmos SysStatCollector
Waiting on 10.64.20.110 (Up, ZeusLeader) to start:
The state of the cluster: start
Lockdown mode: Enabled
CVM: 10.64.20.110 Up, ZeusLeader
Zeus UP [14429, 14442, 14443, 14447, 14453, 14466]
Scavenger UP [14660, 14675, 14676, 14793]
ConnectionSplicer UP [14690, 14703]
Medusa UP [14760, 14775, 14776, 14780, 14940]
DynamicRingChanger UP [15946, 15973, 15974, 15986]
Pithos UP [15950, 15980, 15981, 15994]
Prism UP [15969, 15995, 15996, 16004]
AlertManager UP [16019, 16049, 16051, 16079, 16102]
Arithmos UP [16029, 16080, 16081, 16099]
SysStatCollector UP [16041, 16092, 16093, 16178]
2014-04-17 05:51:07 INFO cluster:1531 Success!
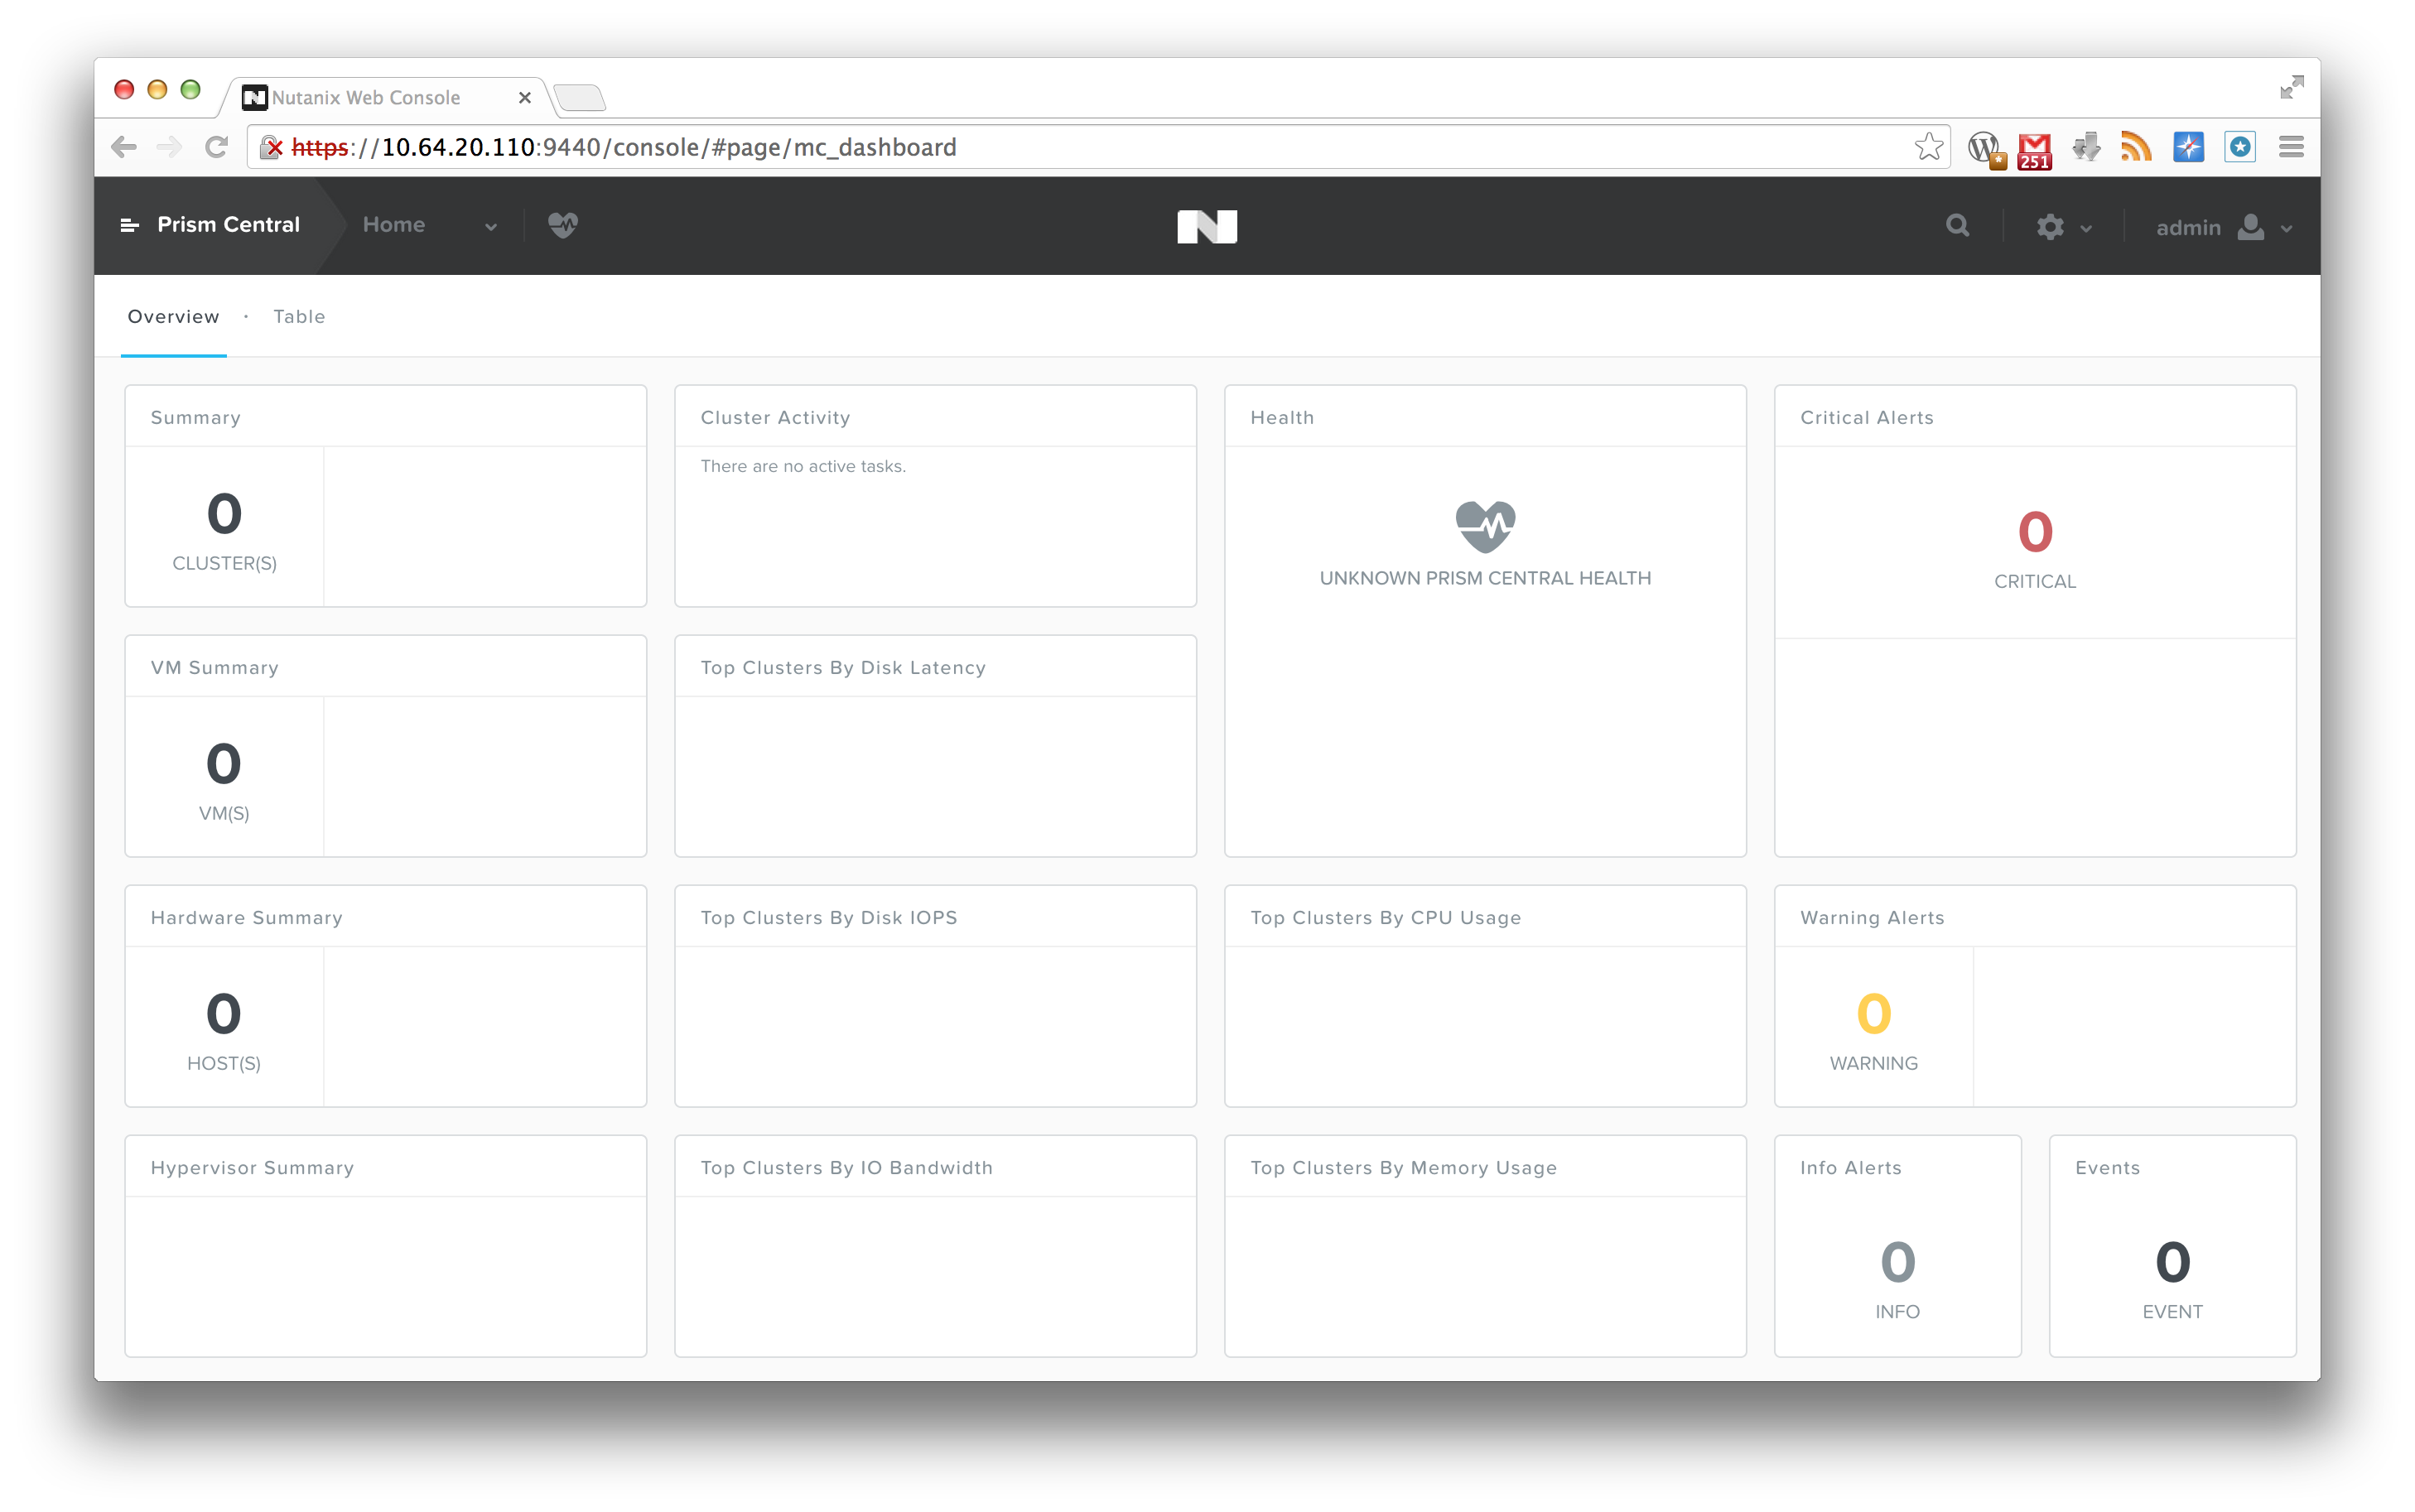
And voila! You can now log on to your instance of Prism Central! Prism Central
As you can see, it looks quite the same as the regular 4.0 version, except that if you click on the top left “Prism Central” text, a menu will fold out on the left hand side. But, since we want to monitor a cluster, let’s go ahead and register a cluster.
To do so, just connect to your NOS 4.0 cluster, and click on the small gear symbol on the top right corner, and select “Prism Central Registration”. There, fill out the Prism Central IP, the username and password for Prism Central, and click on “Save”
Prism Central – Registration
If all goes well, the cluster registers, and you will see an event in your Prism Central stating that a user has been added (we support single sign on in Prism Central), and that a cluster has been added to Multicluster. And, you should now be able to see the new cluster that was registered in Prism Central:
Prism Central – Cluster registered
To now manage that cluster, simply click on Prism Central on the top left, and then select the cluster from the list on the left hand side: Prism Central – Cluster selection
From there on, you can manage the cluster just like you would in your regular interface. My colleague Suda Srinivasan was kind enough to create a video that walks you through the interface:
So, that’s it for now. If you have any questions, feel free to let me know.
I’m getting more and more customer requests that are looking at alternatives for VMware, and are considering a different hypervisor. Since I’m more of a VMware guy, but I am always willing to learn new stuff, I figured I might as well share some info on how to set up the Nutanix cluster on KVM, and create an initial virtual machine.
I’m assuming you have at least some Linux knowledge, and that you were able to get the hosts and the controller VMs configured with an IP address. After that, the basic setup is pretty much the same. Visit the cluser_init page using the IPv6 link local address, which is in the format:
Which looks something like this: Nutanix – Cluster init
Fill out the information in that window, and click the “Create” button. Once that is done, you will see some messages popping up underneath: Configuring IP addresses on node 13SM15400003/A...
Configuring IP addresses on node 13SM15400003/B...
Configuring IP addresses on node 13SM15400003/C...
Configuring the Hypervisor DNS settings on node 13SM15400003/A...
Configuring the Hypervisor DNS settings on node 13SM15400003/B...
Configuring the Hypervisor DNS settings on node 13SM15400003/C...
Configuring the Hypervisor NTP settings on node 13SM15400003/A...
Configuring the Hypervisor NTP settings on node 13SM15400003/B...
Configuring the Hypervisor NTP settings on node 13SM15400003/C...
Configuring Zeus on node 13SM15400003/A...
Configuring Zeus on node 13SM15400003/B...
Configuring Zeus on node 13SM15400003/C...
Initializing cluster...
not ready, trying again in 5 seconds...
Initializing cluster...
Cluster successfully initialized!
Initializing the CVM DNS and NTP servers...
Successfully updated the CVM NTP and DNS server list
What we are doing, is actually configuring the cluster with all the IP addresses, writing the cluster configuration to the underlying services, and starting the cluster for you. Give it a couple of minutes (usually 2 or 3 minutes will suffice), and you can now log on to the IP address of a controller VM, or the “Cluster External IP” that you put in, using the default username and password:
Nutanix – Cluster logon
By the way, I disabled the background video by simply adding “?novideo=true” to the logon URL. This disables the video, and makes logon a bit faster, especially when working via a link that might not have the bandwidth that you would prefer.
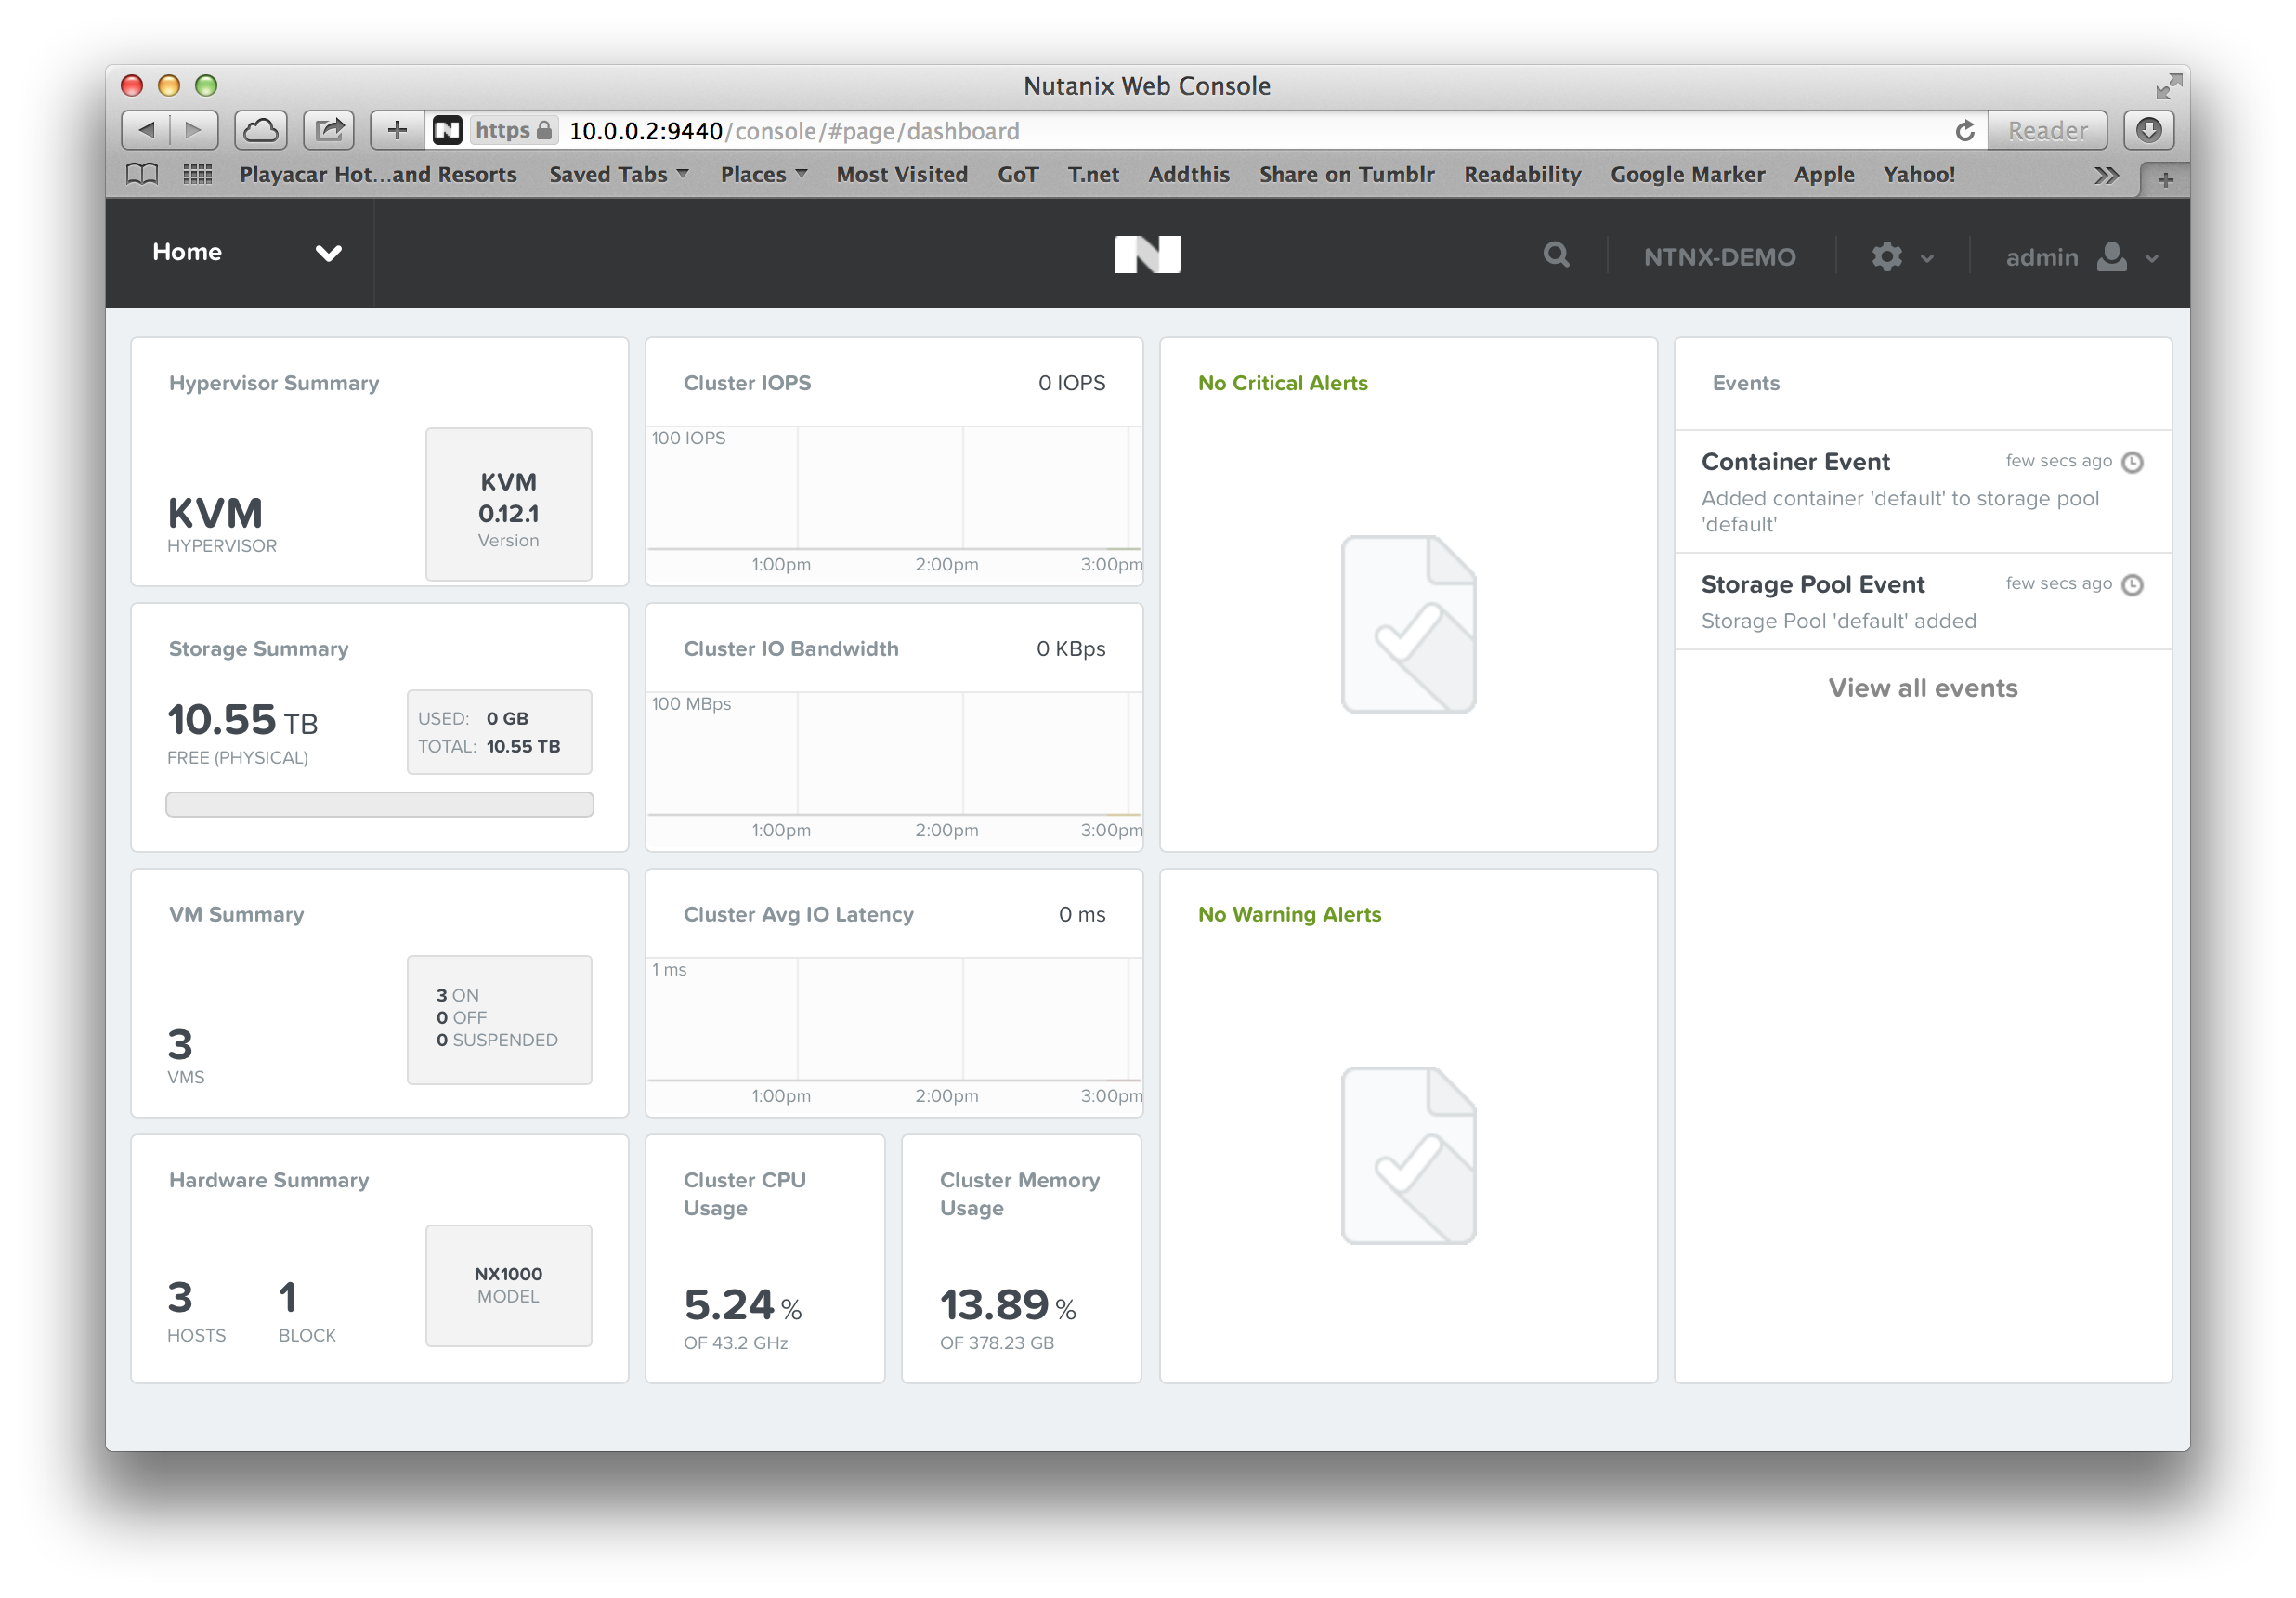
I then created a storage pool by the name of “default”, and created a container with the same name. Once that is done, your cluster is ready for its first VMs.
Nutanix – Cluster ready
Now, Nutanix relies on the management tools that a Hypervisor offers. In the case of vSphere, this would be vCenter. With KVM, or in our case KVM on CentOS, the selection is a bit more limited. Especially, since we make use of the Open Virtual Switch. That means, right now, we use libvirt as the management API, and wrote some extensions of our own. After all, your VMs will be located on storage that is being provided by Nutanix, so it would be good if we gave you some commands to make use of that storage, right? 😉
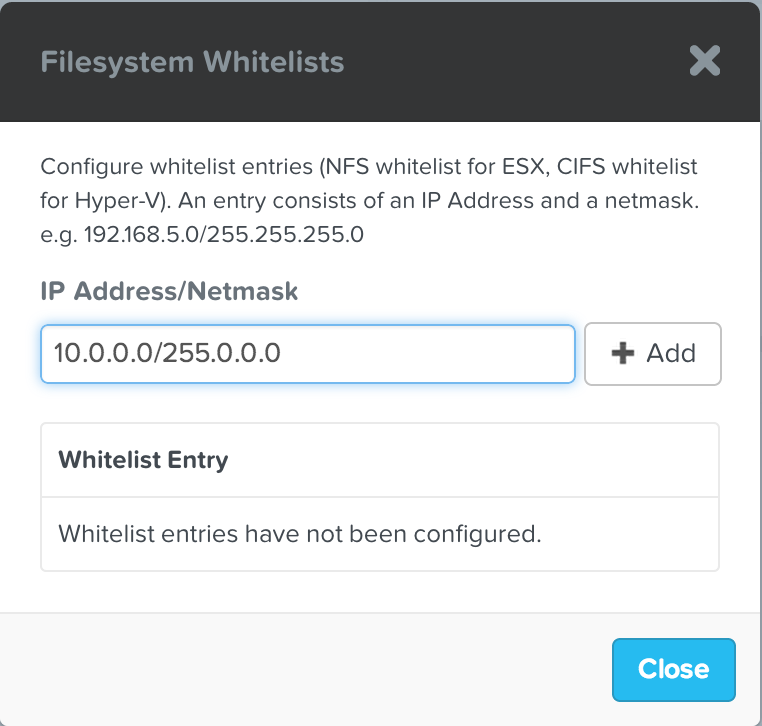
If we want to start the installation of a VM, we are first going to need an installation medium that we can use. So, I’m going to whitelist the default container I just created, and copy over a Ubuntu iso image: Nutanix – Filesystem whitelist
Since you want to be able to see what was uploaded to the container, you can check from any of the controller VMs what is on there: nutanix@NTNX-13SM15400003-A-CVM:10.0.0.30:~$ nfs_ls
ubuntu-13.04-server-amd64.iso
Now, just pick the host that you want to use for your VM, and create the VM using the virt_install command. For example: virt_install --name bas_ubuntu_test --disk 32 --cdrom /default/ubuntu-13.04-server-amd64.iso --nic VM-Network --vcpus 2 --ram 4096
Which would result in the following: nutanix@NTNX-13SM15400003-A-CVM:10.0.0.30:~$ virt_install --name bas_ubuntu_test --disk 32 --cdrom /default/ubuntu-13.04-server-amd64.iso --nic VM-Network --vcpus 2 --ram 4096
2014-02-27 15:26:54 INFO batch_worker.py:211 Preparing nutanix disks: 0%
2014-02-27 15:26:57 INFO batch_worker.py:211 Preparing nutanix disks: 50%
2014-02-27 15:26:57 INFO batch_worker.py:211 Preparing nutanix disks: 100%
2014-02-27 15:26:57 INFO batch_worker.py:211 Creating libvirt storage pools: 0%
2014-02-27 15:26:59 INFO batch_worker.py:211 Creating libvirt storage pools: 50%
2014-02-27 15:26:59 INFO batch_worker.py:211 Creating libvirt storage pools: 100%
2014-02-27 15:26:59 INFO kvm_domain_template.py:184 Running virt-install
Now you have multiple options. You could connect using virt-manager: Nutanix – virt-manager
Or, alternatively, you could open up the VNC port that the VM is running on (or disable iptables alltogether), and use your favorite VNC client to manage the newly created VM: Nutanix – VNC
Most of the commands that Nutanix implemented come with a syntax that is very similar to the native libvirt syntax, but the commands will be named with an underscore instead of a dash. For example live migration of a VM can be performed using: virt_migrate --vm bas_ubuntu_test --destination 10.0.0.20 --live
That’s it for a rough overview. If you have any questions, feel free to contact your local SE, or leave a note in the comments. 🙂
I just received word that because of VMworld, there are some discount codes for the VCP and VCAP certifications. To use the discount, you need to register for the exam at the Pearson VUE website. Don’t forget that the VCAP certifications requires you to register for the exam on the VMware website before scheduling the test on the Pearson VUE website. Just click this link here, go to the certification you want to take, and click the “Register for the exam” button at the top.
Once you receive the clearance, there will be an option at the top of the Pearson Website (where you input your payment details), where you can apply the discount code.
The discount code “VWSF50” will work for the following exams:
VCP-DCV
VCP-DT
VCP-Cloud
VMware IAAS
VMware View
The discount code “VWSFADV50” will work for the following exams:
VCAP-DCD
VCAP-DCA
VCAP-CID
VCAP-CIA
VCAP-DTD
To be eligible for the discount, your test must be scheduled by August 29th 2013, and taken by October 31st 2013.
Good luck on the tests if you decide to schedule one! 🙂
As most of you will know, VMworld is going on right now, and they kicked off this morning with the general Keynote. There were some new announcements, like for example the introduction of NSX, the public beta of VSAN, and the vCloud Suite 5.5.
As always, you’ll be flooded with blog posts and articles, so like the last couple of years, I’ll be trying to give you an overview with links. If you feel like something is missing, please leave a note in the comments, or send me a direct message on Twitter and I’ll try to get it added pronto.
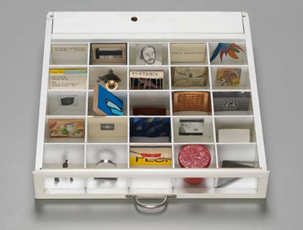
Image copyright of the Davis Museum“You are a black guy, you must be great at dancing and basketball”. “You’re a blonde? Let me explain that joke to you once more”.
Stereotypes. We all know them, we all apply them in some form or the other. We put things in boxes after a quick look, and every drawer has a different label and content to separate the stereotypes. But what if it doesn’t work that way?
Since I joined Nutanix, I’ve been in several customer and partner meetings. Some of the people I’ve get got the idea right away. We are doing something new. Others put us in to a respective box or drawer. “You are a storage company” is one of the classic pieces of feedback. Or, “So you do virtual desktop infrastructure?”.
But there’s more to it. We offer a combination of commodity hardware, combined with a piece of software, and sell that as a solution. And while the use case of virtual desktops is a great one, we can also run things like Splunk, Hadoop and classic server virtualization workloads.
And while we combine the benefits of a shared storage approach to run workloads, we’re not a storage company. We utilize features offered by shared storage to make your life easier. Each node performs its operations on the local storage, but I can use the “Nutanix Distributed File System” or NDFS to create an abstracted layer that offers many of the shared storage benefits. An example would be a shared container for my virtual machines, that are accessible to all of the hosts, enabling features like live migration between hosts.
While that works out really well with our customers, and it gives you the idea you have a SAN or NAS underneath the hoods, Nutanix’s main point is not to replace your SAN or NAS. We want to offer you a “Virtual Computing Platform”, a way to make your life easier when installing, configuring and deploying virtualized workloads and solutions.
That works great, and we’ve received great feedback. There seems to be a slight disconnect though. That begins when people start asking questions like:
What do you mean: “You are not a storage company”…?
A fair question by all means, but the simple answer is: No, we are not.
A simple example that seems to come up as of late is the following. How do I share disk space from your file system directly in to a virtual machine? While there is a way to export the storage directly in to a VM (for example via NFS), this bypasses some of the concepts we utilize. By default, we mount a datastore using an NFS IP address of 192.168.5.1, which runs over a virtual switch that has no uplinks. Since we are talking about traffic that stays within the same vSwitch, we can work at blazing speeds that are not limited by the speed of the physical NIC.
If I were to mount the NFS share from a virtual machine (or a different host), we could use the external IP of the Controller VM. The problem here, is that since the external IPs are different between controller VMs, if you were to migrate your NFS client VM to a different host, everything would go over the regular network. Also, if the controller VM that you connect to as an NFS Server would be offline, your NFS share is not accessible.
The thing is, the Nutanix block is designed to work this way. It offers great flexibility when it comes to running virtualized workloads, but it is not a 100% distributed storage system. We didn’t intend on being a storage system.
It then boils down to design. Is there a way around this? Certainly.
If you want to create a distributed CIFS file share, take a look at solutions like DFS from Microsoft. You can run multiple VMs inside of a container/datastore, and just pass the disk space of the VM through. If you need more space, just add more VMs on a different node, and add capacity, and off you go. And if you run out of space on your cluster? Just add another Nutanix node, get a VM up and running, and follow the same procedure.
That way, you are actually utilizing the distributed nature of our virtual compute platform, and running your storage services in a distributed manner. Gluster FS could be a possible solution to achieve the same thing with NFS on Linux.
And like I said, if this sounds like we are not a storage company? You are absolutely right, we are not. So you might want to categorize us under a different label, put us in a different box, or create an entirely new stereotype. 😉
At the moment, I’m lucky enough to have a Nutanix block at home that I use for demos (it’s coming along to Switzerland with me tomorrow). It’s not the model with the highest specs, but it helps in giving customers a chance to actually see the kit, and give partners some hands-on time. In case you are wondering, I’m actually working with a NX-2400, or a 4-node NX-2000 cluster, hence 2400.
Thing is though, that it was running an older version of the Nutanix Operating System (NOS), which I upgraded to the latest version (NOS 3.1) without a hitch, and it was running ESXi 5.0. And to play with some of the latest features, I actually decided to upgrade to ESXi 5.1, and I figured I might as well share how that worked out for me.
The steps are relatively simple, but I figured I’ll document them here anyway. One word of caution though:
This was done with the latest info from the Nutanix knowledge base. Be sure to check if there are updated instructions available prior to upgrading your own block.
So, step one is to actually get the installation media for ESXi 5.1. In case of the NX-3000, you can use the standard ESXi 5.1 image. For the NX-2000 systems, you need to use an image that is customized by Nutanix. Contact myself or your local systems engineer to get the download location.
Next, create a bootable USB stick using the image. Easiest way I found is to actually format the stick with FAT32 as the filesystem. I recommend using a Windows system, or a Windows VM, since no matter what I tried, I couldn’t get it to boot using a Mac. Once the drive is formatted, I used UNetbootin:
Click on “Disc Image” and select the ISO file. Make sure “USB Drive” is selected, and point it to the correct drive. Then click on “OK”, and watch it go to work. If it gives you a message stating that menu.c32 is already present, click on the “Yes” button.
We’ll also need to edit the NFS heartbeat timeout settings. To do that, log on to vCenter, select the node and go to “Software” -> “Advanced settings”. There go to the NFS entries, and modify the “NFS.HeartbeatTimeout” setting to 30 seconds. Do that for each host.
Next, we need to make sure the multiextent module is loaded. Add the following lines to /etc/rc.local.d/local.sh on each host (if not already there): #added to support multiextent
localcli system module load -m multiextent
#end of adding
Then restart the host.
Once you are done, it is time to start the upgrade. Go in to the BIOS (using the Delete key) on the node you want to upgrade, and change the boot order so that you actually start off of your USB stick. Once you save the config and restart, you will be given a menu where you select the second option:
After that you should be able to see the trusted ESXi boot sequence:
At the installation screen, just hit the “Enter” key to continue with the installation. Read the license agreement, and continue with F11. Next, you are asked where the installation should reside. Normally you should see the Intel SSD already have a VMFS partition, indicated by the small asterisk in front of the disk. Select that disk and press “Enter” to continue:
Next, a prompt should show up asking if you want to upgrade. Select that option, and press “enter” once more:
The final step is to confirm your upgrade by pressing the “F11” key. Once the upgrade is done, remove the USB thumb drive, and reboot the server by again hitting the “Enter” key. Let the node reboot, change the boot order to the original sequence, and, tadaaaaaa:
Now, obviously this would be easier using the vSphere Update Manager, but this was the solution I used, since I only installed the vCenter virtual appliance. Not pretty but it works.
One key thing left to do, is to re-register the controller VMs on your ESXi host. You can do this via the vSphere client going directly to the ESXi host. Just right-click the VM and select “remove from inventory”. Then browse the datastore, go to the folder saying “ServiceVM-1.24_Ubuntu” and add the VM to the inventory using the VMX file. You can now start your VM after you confirmed that you moved it. 🙂
The other alternative to re-register your VM using vim-cmd via an SSH session on to your ESXi host. Just check which VMs you have running: vim-cmd vmsvc/getallvms
Vmid Name File Guest OS Version Annotation
190 NTNX-TRAIN2-S11317022510746-A-CVM--2- [NTNX-local-ds-S11317022510746-A] ServiceVM/ServiceVM.vmx ubuntu64Guest vmx-07Remember the VMID and de-register the VM: vim-cmd vmsvc/unregister [vmid of controller VM]Now simply re-register the VM: vim-cmd solo/register [/full/file/path/to/the/controller_vm_name.vmx]You might want to rename the controller VM once you have registered it.
Should you have any issues starting the VM, make sure that there is no line saying: sched.mem.prealloc = "TRUE"in the .vmx file of you VM. If this line is present, remove it, and re-register your VM.
So, this is something I found out just after my first day at Nutanix. There is a Facebook post by Nutanix, stating the following:
Nutanix would like to congratulate all #vExpert winners with a personalized pint glass at #VMWorld! Winners- reach out to us if interested.
I sent out a tweet, and got back a couple of replies. Some folks don’t use Facebook, some won’t be visiting VMworld in the US (or Europe for that matter), and it wasn’t quite clear what info was needed.
In an effort to consolidate this a bit more, I set up a Google spreadsheet, that just has some basic info. Your first name, last name, Twitter handle, and if you will be visiting VMworld in the US or Europe. You don’t have to sign in, editing is possible when accessing the document using the direct link.
Should you not visit, I think we can arrange that the personalized pint glass will be shipped to you, and we will follow up with you regarding details on shipping. Just make sure that you either follow the Nutanix Twitter account, or my Twitter account so that we can send you a direct message should we need your shipping information.
And in case you are wondering, I took the liberty of filling out the info of the people who had already replied to me via Twitter. And yes, we will be checking if you are on the official list. 😉