Recently my parents switched to a Mac from a PC, and I helped set things up for them. The machine was quite nice, a new iMac Retina, and I helped my dad migrate their old PC to a VM on the new Mac. Now, this entire process is pretty straightforward. You put the Mac and the PC on the same network, input a four digit token (or input an IP and port), then authenticate with a user and password, and things should work.
Unfortunately, that wasn’t quite the case for me. The Windows system wanted to have UAC disable on the Windows 8 Machine, which isn’t a problem, but the error message wouldn’t go away. Problem was, that it was a pretty generic error message “A failure occurred”, without even so much as an error code that made any sense. The log files also didn’t work.
While I was guessing it might be related to a username problem (spaces in the username), I tried several things on the Windows side, and checked the user on the Mac as well. It was then I found out that under OSX Mavericks, you can now enable using an iCloud password, which was already set up (using a screenshot here of my MacBook Pro as an example):
iCloud Password
Long story short, as soon as I used a separate local password for the user, the P2V migration worked like a charm. I enabled the iCloud password again, and the migration wouldn’t go through. Since I wasn’t able to find this in the VMware KB, I figured I might as well share this here.
One of the features that has been announced for Nutanix OS 4.0 (also called NOS), is something called Prism Central.
So what does Prism Central do? Well, perhaps things are more obvious if we speak about the internal name we once used. It was referenced as our Multi-Cluster UI, and that is exactly what it is. Instead of having to open multiple tabs in your browser and switching between tabs to actually manage your Nutanix clusters, you can now open one tab, register multiple clusters, and manage them all from one interface, or get a basic overview of what is going on across all clusters.
First things first: Disclaimer – Keep in mind this is based on an early code version, and things will most likely change before you can download the software.
I spoke to our developers, and received a version to play with, so I’ll walk you through the process. Prism Central comes as an OVF, and you simply deploy this VM in your infrastructure. The requirements for the VM are the following (again, this might change):
8GB RAM

2 vCPUs

260GB disk space
With that configuration, you can monitor 100 nodes while we assume that you can go up to 100 VMs per node.
With that said, the installation itself is quite easy. We deploy the OVF from vCenter: Prism Central – OVF Deployment
We give the VM a name: Prism Central – OVF Deployment – Naming
And follow the normal steps for any OVF. Things like selecting a resource pool, datastore, and then selecting the disk format and network mapping. You will only need one interface, but I’d recommend deploying the Prism Central VM in the same network as your controller VMs. Once that is done, you click on “Finish” and wait for the VM to deploy: Prism Central – OVF Deployment – Finished
Now, my assumption is that we will be changing to the OVA format to make deployment a bit easier. In this version, I still had to configure the IP addresses manually (no DHCP in my network), and deploying from an OVA should make that a breeze, but I will outline the steps I used here anyway.
After connecting to the vSphere console of the VM, we log on to the console using “nutanix” as the user and “nutanix/4u” as the password. Then, you simply edit the file /etc/sysconfig/network-scripts/ifcfg-eth0 and input the IP-address you would like to use. In my case it looks like this:
Simply save the file and restart your network services, and you should now be able to access the machine using your favorite ssh client. Now there is one thing left to do (and again, I’m assuming this should no longer be there in a final release, just trying to be complete):
Which should result in something like this: nutanix@NTNX-10-64-20-110-A-CVM:~$ cluster -f --cluster_function_list="multicluster" -s 10.64.20.110 create
2014-04-17 05:50:37 INFO cluster:1469 Executing action create on SVMs 10.64.20.110
2014-04-17 05:50:37 INFO cluster:593 Discovered node:
ip: 10.64.20.110
rackable_unit_serial: 10-64-20-110
node_position: A
node_uuid: ed763914-2c16-4aff-9b6b-d4ea962af9fe
2014-04-17 05:50:37 INFO cluster:632 Configuring Zeus mapping ({u'10.64.20.110': 1}) on SVM node 10.64.20.110
2014-04-17 05:50:37 INFO cluster:650 Creating cluster with SVMs: 10.64.20.110
2014-04-17 05:50:37 INFO cluster:654 Disable fault tolerance for 1-node cluster
2014-04-17 05:50:39 INFO cluster:687 Waiting for services to start
Waiting on 10.64.20.110 (Up, ZeusLeader) to start: ConnectionSplicer Medusa DynamicRingChanger Pithos Prism AlertManager Arithmos SysStatCollector
Waiting on 10.64.20.110 (Up, ZeusLeader) to start: ConnectionSplicer Medusa DynamicRingChanger Pithos Prism AlertManager Arithmos SysStatCollector
Waiting on 10.64.20.110 (Up, ZeusLeader) to start: DynamicRingChanger Pithos Prism AlertManager Arithmos SysStatCollector
...
...
...
Waiting on 10.64.20.110 (Up, ZeusLeader) to start: DynamicRingChanger Pithos Prism AlertManager Arithmos SysStatCollector
Waiting on 10.64.20.110 (Up, ZeusLeader) to start: AlertManager Arithmos SysStatCollector
Waiting on 10.64.20.110 (Up, ZeusLeader) to start:
The state of the cluster: start
Lockdown mode: Enabled
CVM: 10.64.20.110 Up, ZeusLeader
Zeus UP [14429, 14442, 14443, 14447, 14453, 14466]
Scavenger UP [14660, 14675, 14676, 14793]
ConnectionSplicer UP [14690, 14703]
Medusa UP [14760, 14775, 14776, 14780, 14940]
DynamicRingChanger UP [15946, 15973, 15974, 15986]
Pithos UP [15950, 15980, 15981, 15994]
Prism UP [15969, 15995, 15996, 16004]
AlertManager UP [16019, 16049, 16051, 16079, 16102]
Arithmos UP [16029, 16080, 16081, 16099]
SysStatCollector UP [16041, 16092, 16093, 16178]
2014-04-17 05:51:07 INFO cluster:1531 Success!
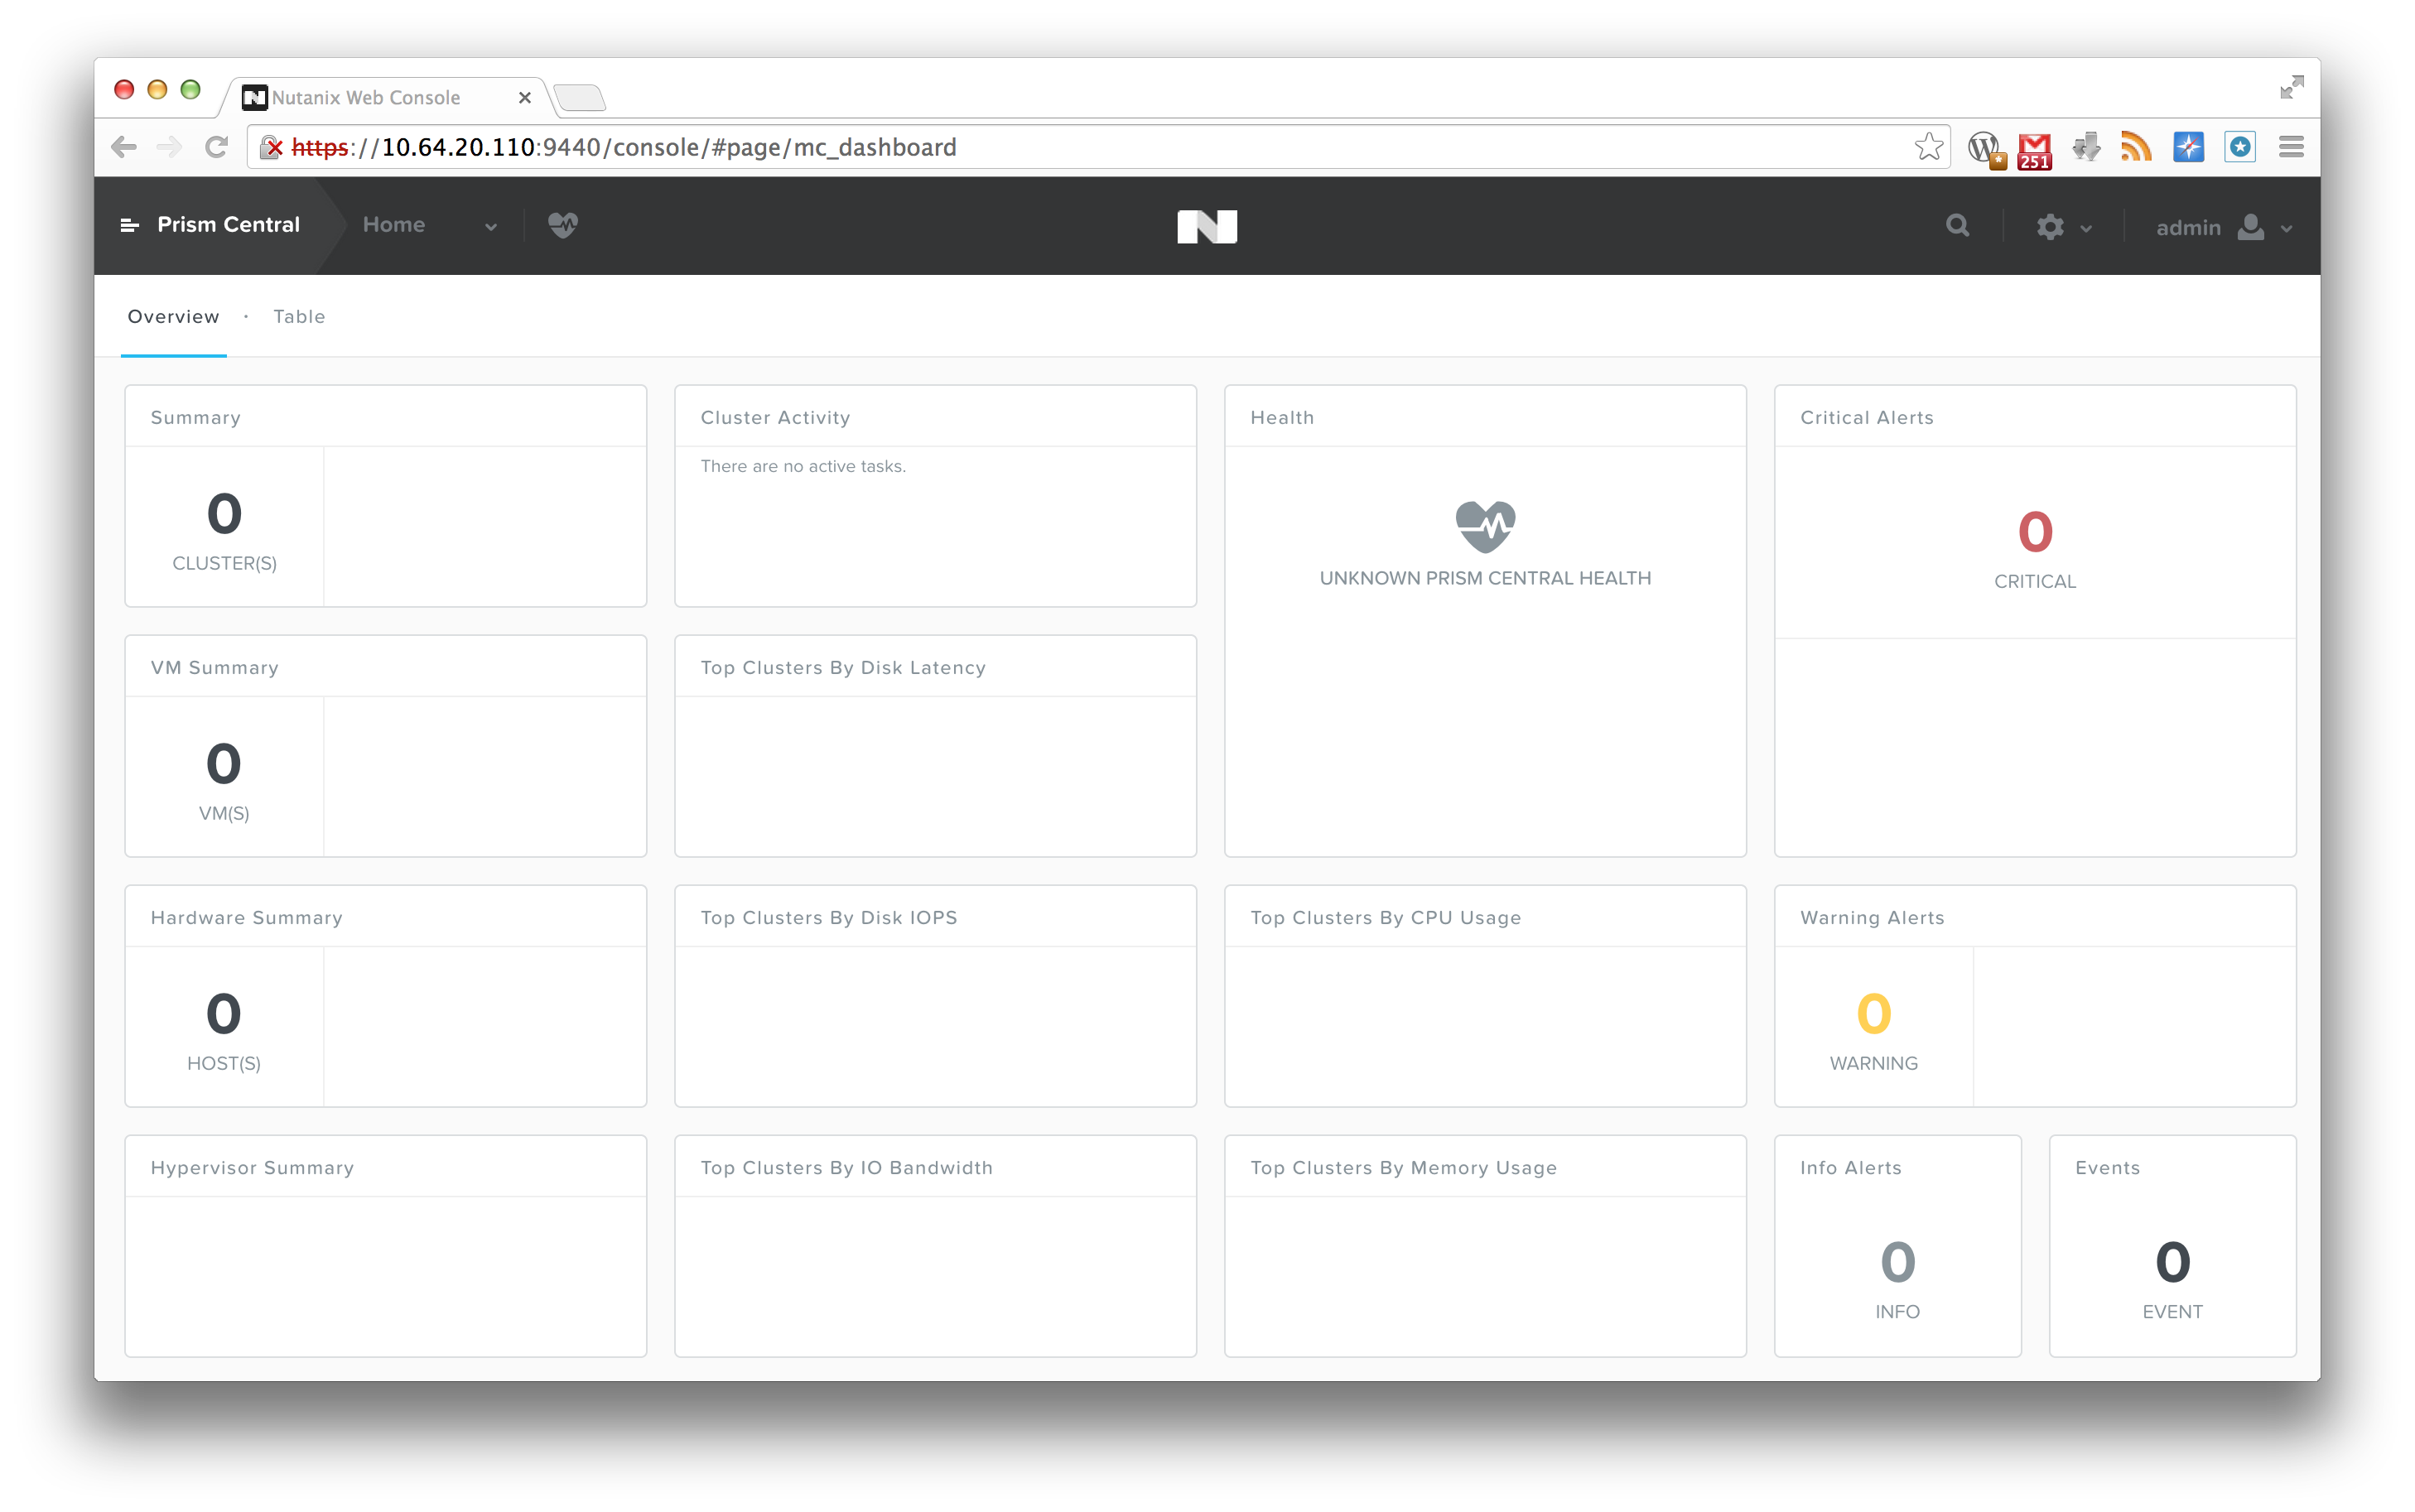
And voila! You can now log on to your instance of Prism Central! Prism Central
As you can see, it looks quite the same as the regular 4.0 version, except that if you click on the top left “Prism Central” text, a menu will fold out on the left hand side. But, since we want to monitor a cluster, let’s go ahead and register a cluster.
To do so, just connect to your NOS 4.0 cluster, and click on the small gear symbol on the top right corner, and select “Prism Central Registration”. There, fill out the Prism Central IP, the username and password for Prism Central, and click on “Save”
Prism Central – Registration
If all goes well, the cluster registers, and you will see an event in your Prism Central stating that a user has been added (we support single sign on in Prism Central), and that a cluster has been added to Multicluster. And, you should now be able to see the new cluster that was registered in Prism Central:
Prism Central – Cluster registered
To now manage that cluster, simply click on Prism Central on the top left, and then select the cluster from the list on the left hand side: Prism Central – Cluster selection
From there on, you can manage the cluster just like you would in your regular interface. My colleague Suda Srinivasan was kind enough to create a video that walks you through the interface:
So, that’s it for now. If you have any questions, feel free to let me know.
I just received word that because of VMworld, there are some discount codes for the VCP and VCAP certifications. To use the discount, you need to register for the exam at the Pearson VUE website. Don’t forget that the VCAP certifications requires you to register for the exam on the VMware website before scheduling the test on the Pearson VUE website. Just click this link here, go to the certification you want to take, and click the “Register for the exam” button at the top.
Once you receive the clearance, there will be an option at the top of the Pearson Website (where you input your payment details), where you can apply the discount code.
The discount code “VWSF50” will work for the following exams:
VCP-DCV
VCP-DT
VCP-Cloud
VMware IAAS
VMware View
The discount code “VWSFADV50” will work for the following exams:
VCAP-DCD
VCAP-DCA
VCAP-CID
VCAP-CIA
VCAP-DTD
To be eligible for the discount, your test must be scheduled by August 29th 2013, and taken by October 31st 2013.
Good luck on the tests if you decide to schedule one! 🙂
As most of you will know, VMworld is going on right now, and they kicked off this morning with the general Keynote. There were some new announcements, like for example the introduction of NSX, the public beta of VSAN, and the vCloud Suite 5.5.
As always, you’ll be flooded with blog posts and articles, so like the last couple of years, I’ll be trying to give you an overview with links. If you feel like something is missing, please leave a note in the comments, or send me a direct message on Twitter and I’ll try to get it added pronto.
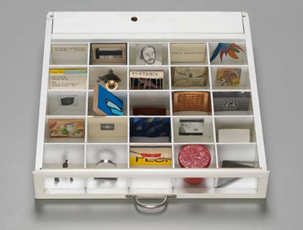
Image copyright of the Davis Museum“You are a black guy, you must be great at dancing and basketball”. “You’re a blonde? Let me explain that joke to you once more”.
Stereotypes. We all know them, we all apply them in some form or the other. We put things in boxes after a quick look, and every drawer has a different label and content to separate the stereotypes. But what if it doesn’t work that way?
Since I joined Nutanix, I’ve been in several customer and partner meetings. Some of the people I’ve get got the idea right away. We are doing something new. Others put us in to a respective box or drawer. “You are a storage company” is one of the classic pieces of feedback. Or, “So you do virtual desktop infrastructure?”.
But there’s more to it. We offer a combination of commodity hardware, combined with a piece of software, and sell that as a solution. And while the use case of virtual desktops is a great one, we can also run things like Splunk, Hadoop and classic server virtualization workloads.
And while we combine the benefits of a shared storage approach to run workloads, we’re not a storage company. We utilize features offered by shared storage to make your life easier. Each node performs its operations on the local storage, but I can use the “Nutanix Distributed File System” or NDFS to create an abstracted layer that offers many of the shared storage benefits. An example would be a shared container for my virtual machines, that are accessible to all of the hosts, enabling features like live migration between hosts.
While that works out really well with our customers, and it gives you the idea you have a SAN or NAS underneath the hoods, Nutanix’s main point is not to replace your SAN or NAS. We want to offer you a “Virtual Computing Platform”, a way to make your life easier when installing, configuring and deploying virtualized workloads and solutions.
That works great, and we’ve received great feedback. There seems to be a slight disconnect though. That begins when people start asking questions like:
What do you mean: “You are not a storage company”…?
A fair question by all means, but the simple answer is: No, we are not.
A simple example that seems to come up as of late is the following. How do I share disk space from your file system directly in to a virtual machine? While there is a way to export the storage directly in to a VM (for example via NFS), this bypasses some of the concepts we utilize. By default, we mount a datastore using an NFS IP address of 192.168.5.1, which runs over a virtual switch that has no uplinks. Since we are talking about traffic that stays within the same vSwitch, we can work at blazing speeds that are not limited by the speed of the physical NIC.
If I were to mount the NFS share from a virtual machine (or a different host), we could use the external IP of the Controller VM. The problem here, is that since the external IPs are different between controller VMs, if you were to migrate your NFS client VM to a different host, everything would go over the regular network. Also, if the controller VM that you connect to as an NFS Server would be offline, your NFS share is not accessible.
The thing is, the Nutanix block is designed to work this way. It offers great flexibility when it comes to running virtualized workloads, but it is not a 100% distributed storage system. We didn’t intend on being a storage system.
It then boils down to design. Is there a way around this? Certainly.
If you want to create a distributed CIFS file share, take a look at solutions like DFS from Microsoft. You can run multiple VMs inside of a container/datastore, and just pass the disk space of the VM through. If you need more space, just add more VMs on a different node, and add capacity, and off you go. And if you run out of space on your cluster? Just add another Nutanix node, get a VM up and running, and follow the same procedure.
That way, you are actually utilizing the distributed nature of our virtual compute platform, and running your storage services in a distributed manner. Gluster FS could be a possible solution to achieve the same thing with NFS on Linux.
And like I said, if this sounds like we are not a storage company? You are absolutely right, we are not. So you might want to categorize us under a different label, put us in a different box, or create an entirely new stereotype. 😉
At the moment, I’m lucky enough to have a Nutanix block at home that I use for demos (it’s coming along to Switzerland with me tomorrow). It’s not the model with the highest specs, but it helps in giving customers a chance to actually see the kit, and give partners some hands-on time. In case you are wondering, I’m actually working with a NX-2400, or a 4-node NX-2000 cluster, hence 2400.
Thing is though, that it was running an older version of the Nutanix Operating System (NOS), which I upgraded to the latest version (NOS 3.1) without a hitch, and it was running ESXi 5.0. And to play with some of the latest features, I actually decided to upgrade to ESXi 5.1, and I figured I might as well share how that worked out for me.
The steps are relatively simple, but I figured I’ll document them here anyway. One word of caution though:
This was done with the latest info from the Nutanix knowledge base. Be sure to check if there are updated instructions available prior to upgrading your own block.
So, step one is to actually get the installation media for ESXi 5.1. In case of the NX-3000, you can use the standard ESXi 5.1 image. For the NX-2000 systems, you need to use an image that is customized by Nutanix. Contact myself or your local systems engineer to get the download location.
Next, create a bootable USB stick using the image. Easiest way I found is to actually format the stick with FAT32 as the filesystem. I recommend using a Windows system, or a Windows VM, since no matter what I tried, I couldn’t get it to boot using a Mac. Once the drive is formatted, I used UNetbootin:
Click on “Disc Image” and select the ISO file. Make sure “USB Drive” is selected, and point it to the correct drive. Then click on “OK”, and watch it go to work. If it gives you a message stating that menu.c32 is already present, click on the “Yes” button.
We’ll also need to edit the NFS heartbeat timeout settings. To do that, log on to vCenter, select the node and go to “Software” -> “Advanced settings”. There go to the NFS entries, and modify the “NFS.HeartbeatTimeout” setting to 30 seconds. Do that for each host.
Next, we need to make sure the multiextent module is loaded. Add the following lines to /etc/rc.local.d/local.sh on each host (if not already there): #added to support multiextent
localcli system module load -m multiextent
#end of adding
Then restart the host.
Once you are done, it is time to start the upgrade. Go in to the BIOS (using the Delete key) on the node you want to upgrade, and change the boot order so that you actually start off of your USB stick. Once you save the config and restart, you will be given a menu where you select the second option:
After that you should be able to see the trusted ESXi boot sequence:
At the installation screen, just hit the “Enter” key to continue with the installation. Read the license agreement, and continue with F11. Next, you are asked where the installation should reside. Normally you should see the Intel SSD already have a VMFS partition, indicated by the small asterisk in front of the disk. Select that disk and press “Enter” to continue:
Next, a prompt should show up asking if you want to upgrade. Select that option, and press “enter” once more:
The final step is to confirm your upgrade by pressing the “F11” key. Once the upgrade is done, remove the USB thumb drive, and reboot the server by again hitting the “Enter” key. Let the node reboot, change the boot order to the original sequence, and, tadaaaaaa:
Now, obviously this would be easier using the vSphere Update Manager, but this was the solution I used, since I only installed the vCenter virtual appliance. Not pretty but it works.
One key thing left to do, is to re-register the controller VMs on your ESXi host. You can do this via the vSphere client going directly to the ESXi host. Just right-click the VM and select “remove from inventory”. Then browse the datastore, go to the folder saying “ServiceVM-1.24_Ubuntu” and add the VM to the inventory using the VMX file. You can now start your VM after you confirmed that you moved it. 🙂
The other alternative to re-register your VM using vim-cmd via an SSH session on to your ESXi host. Just check which VMs you have running: vim-cmd vmsvc/getallvms
Vmid Name File Guest OS Version Annotation
190 NTNX-TRAIN2-S11317022510746-A-CVM--2- [NTNX-local-ds-S11317022510746-A] ServiceVM/ServiceVM.vmx ubuntu64Guest vmx-07Remember the VMID and de-register the VM: vim-cmd vmsvc/unregister [vmid of controller VM]Now simply re-register the VM: vim-cmd solo/register [/full/file/path/to/the/controller_vm_name.vmx]You might want to rename the controller VM once you have registered it.
Should you have any issues starting the VM, make sure that there is no line saying: sched.mem.prealloc = "TRUE"in the .vmx file of you VM. If this line is present, remove it, and re-register your VM.
So, this is something I found out just after my first day at Nutanix. There is a Facebook post by Nutanix, stating the following:
Nutanix would like to congratulate all #vExpert winners with a personalized pint glass at #VMWorld! Winners- reach out to us if interested.
I sent out a tweet, and got back a couple of replies. Some folks don’t use Facebook, some won’t be visiting VMworld in the US (or Europe for that matter), and it wasn’t quite clear what info was needed.
In an effort to consolidate this a bit more, I set up a Google spreadsheet, that just has some basic info. Your first name, last name, Twitter handle, and if you will be visiting VMworld in the US or Europe. You don’t have to sign in, editing is possible when accessing the document using the direct link.
Should you not visit, I think we can arrange that the personalized pint glass will be shipped to you, and we will follow up with you regarding details on shipping. Just make sure that you either follow the Nutanix Twitter account, or my Twitter account so that we can send you a direct message should we need your shipping information.
And in case you are wondering, I took the liberty of filling out the info of the people who had already replied to me via Twitter. And yes, we will be checking if you are on the official list. 😉
Just a small reminder for the people that live in my area. On Friday, June 7th, the German VMware User Group (VMUG) west will be meeting up at the EMC office in Schwalbach (click here for a PDF with the address and route). In case you don’t know what the VMUG is for, here’s a quick summary:
The VMware User Group (VMUG) is an independent, global, customer-led organization, created to maximize members’ use of VMware and partner solutions through knowledge sharing, training, collaboration, and events.
The beauty of it? It’s something set up by users for other users. That means that people come to these events to get information that is vendor neutral, and have the ability to talk freely to others without having to fear that someone is trying to only give them the marketing pitch. Or at least, that is what it should be like.
So, the Germany West VMUG Meeting is at Friday, June 7, 2013 at the following address and time:
09:30 – 16:15
EMC Deutschland GmbH
Am Kronberger Hang 2a
65824 Schwalbach/Taunus
You can use this link to register for the event, free of charge, and get to see talks on VMware Nicira, “VMware Network & Security” and other security related topics.
And one important thing to note. The VMUG is a community set up by VMware customers for VMware customers. To exchange ideas, exchange common issues or worries, learn and get to know others in the community. If you feel like you can contribute, submit a proposal for a talk, or suggest a topic for the next VMUG. The more people that participate, the better a VMUG gets!
I’ll be there, and I’m looking forward to seeing you there!
Things have been relatively quiet on my blog, and I need to apologize for that. I’ve been swamped in work, and besides work, I’ve also been busy with a suggestion for a book that was accepted by VMware Press. Plenty of stuff to do, but that is not an excuse to not blog. And for that, I am genuinely sorry.
That doesn’t mean that things haven’t moved forward though. The 2013 vExpert application was opened, and there was a call for papers for VMworld in 2013. I did actually submit one session proposal, and seems to have made it through the first round. That means it is off to public voting, and that is where I need some help.
I submitted my session titled “vCenter Operations: Advanced dashboard creation and monitoring made easy”. And I think the title speaks for itself, but let me give you an abstract anyway:
vCenter Operations: Advanced dashboard creation and monitoring made easy” does what the title says. Getting an initial start with vCenter Operations is easy, but the custom view gets people puzzled.
In my session, I will show that creating your own advanced dashboards isn’t rocket science, and try to show tips and tricks to create advanced dashboards in an easy way.
If you are interested in helping me out, the key thing to know is that you need a VMworld account. You can quickly register an account (free of charge, obviously) at http://www.vmworld.com. Once you registered your account, just follow this link:
From there on everything is relatively straightforward. You will get a list of all of the session proposals, all with a small icon of a white thumb in front of the sessions. To vote, just click on the thumb. You’ll receive a confirmation window that you voted, and the thumb will turn green:
So, if you feel like this may be something that could interest you, you can help by voting for me. And in case you don’t like my proposal? I’d recommend that you still have a look through the list of proposals, and help someone else with your votes. There are cool sessions which I personally like, like for example:
5076 – Design vC Ops Dashboards that make you a rockstar for your operators. Lessons learned from multi-year dashboard design using different data adapters.
4872 – Operating and Architecting a vMSC based infrastructure
4518 – A Technical Deep Dive on NFS Network Design
4570 – Ask the Expert VCDX’s
5155 – Network Virtualization for vSphere Admins: What You Need to Know
4769 – An Introduction to VMware’s vCloud Network and Security Virtualization Architecture and Platform as part of the Software Defined Data Center (SDDC).
And there are more good ones out there. Chad Sakac has also done a blog post on his favorite sessions here.
So please, vote for me, vote for others, but most important of all: vote! 🙂
I’m a techie. I like technology, and ask me to solve a problem that involves something with a computer, and usually I’ll get it solved. My boss seems to know that, and it’s one of the reasons why I get pulled in to projects that require hands-on.
I like to talk about technology. It’s one of the reasons that I enjoy being in my current pre-sales role so much. I enjoy taking a technology, trying to simplify what it does, and then talking to a customer to see if a technology can add value in their setup, or solve one or more specific problems they might be having.
The one doesn’t work without the other for me. I need stick time with something before I’m really able to effectively communicate about it. I’m not the kind of guy to go over a PowerPoint presentation and then deduce how a product works in real life. I can do that up to a certain degree, but I won’t feel really confident without having some form of hands-on.
In comes the design part
In one of my previous posts, I asked how you learn to speak design. There are design methodologies that can help you uncover goals, and it will be up to you to identify the CARR, or written out:
Constraints
Assumptions
Risks
Requirements
And this is where the hard part is for me. I don’t deal with this terminology, in a design environment, on a day-to-day basis. And it makes it hard to actually categorize these in a correct fashion, without a lot of practice.
There is a good document on the VMware Community page that goes in to detail on “Functional versus Non-functional” requirements. The document states the following:
Functional requirements specify specific behavior or functions, for example:
“Display the heart rate, blood pressure and temperature of a patient connected to the patient monitor.”
…..
Non-functional requirements specify all the remaining requirements not covered by the functional requirements. They specify criteria that judge the operation of a system, rather than specific behaviors, for example: “Display of the patient’s vital signs must respond to a change in the patient’s status within 2 seconds.”
Which makes it relatively simple. Those are simple examples, and when you keep in mind that a non-functional requirement usually is a design constraint, you should be all set to identify constraints and requirements, right?
Maybe not so much?
Along comes something in a different form, and then the over-thinking starts:
“You must re-use existing server hardware”.
That’s great. I “must” do something, so it’s a requirement, right? But does this change the way that “my heart rate is displayed”? Well, since I’m a techie, depending on the server model, this might influence the way it’s displayed. Do I need to change my design because I’m re-using the hardware? Well, you may need to. But normally your design shouldn’t depend on the hardware you are re-using. But what if it’s not allowing me to create a cluster, or run certain workloads, or is so old that it won’t allow me to use certain features?
And the rambling goes on, and on, and on.. At least, I think this is where a lot of folks can go wrong. My gut feeling is that we perhaps over-think what is being said/asked. If we know nothing about the environment at all, but the customer tells us that we need to re-use the hardware that is already in place, then that is a?
Requirement? We are after all required to re-use the hardware?
Constraint? We are constrained from bringing in any other hardware?
What would be your take on this? And what do you use to actually differentiate and remember what is what?